Unclutter is very good with storing your quick files and notes. You have almost instant access to your well-organized data. Among many other features. But how to find these files and notes on your Мас disk?
How to change the storage folder and sync your data across devices?
The Default Location
By default Unclutter stores your files and notes in these folders:
~/Library/Containers/com.softwareambience.Unclutter/Data/Library/Application Support/Unclutter/FileStorage
~/Library/Containers/com.softwareambience.Unclutter/Data/Library/Application Support/Unclutter/Notes
where ~ is your user home folder.
Don’t be surprised, these folders are provided by macOS system. So, with the first launch, these are the only locations on your disk that Unclutter has “write” access to (security measures).
Q: Can I change the storage folder?
Yes. Absolutely.
It is recommended that you set up your own folders to store your files and notes for several reasons:
- You will always know where your data is.
So it’s easy to find it on the disk. - Switching from Default Location to your custom folder also enables the system-wide Spotlight search. You’ll be able to quickly find your files and notes even outside the Unclutter interface.
- If you set the storage folder to be inside your cloud drive (iCloud, Dropbox, Google Drive, etc), you will have your data synced automatically.
Q: How do I change the storage folder?
As an example, let’s change the storage folder for Unclutter Files.
It is pretty simple. Once you get the idea, you will be able to do the same for Notes with no problem.
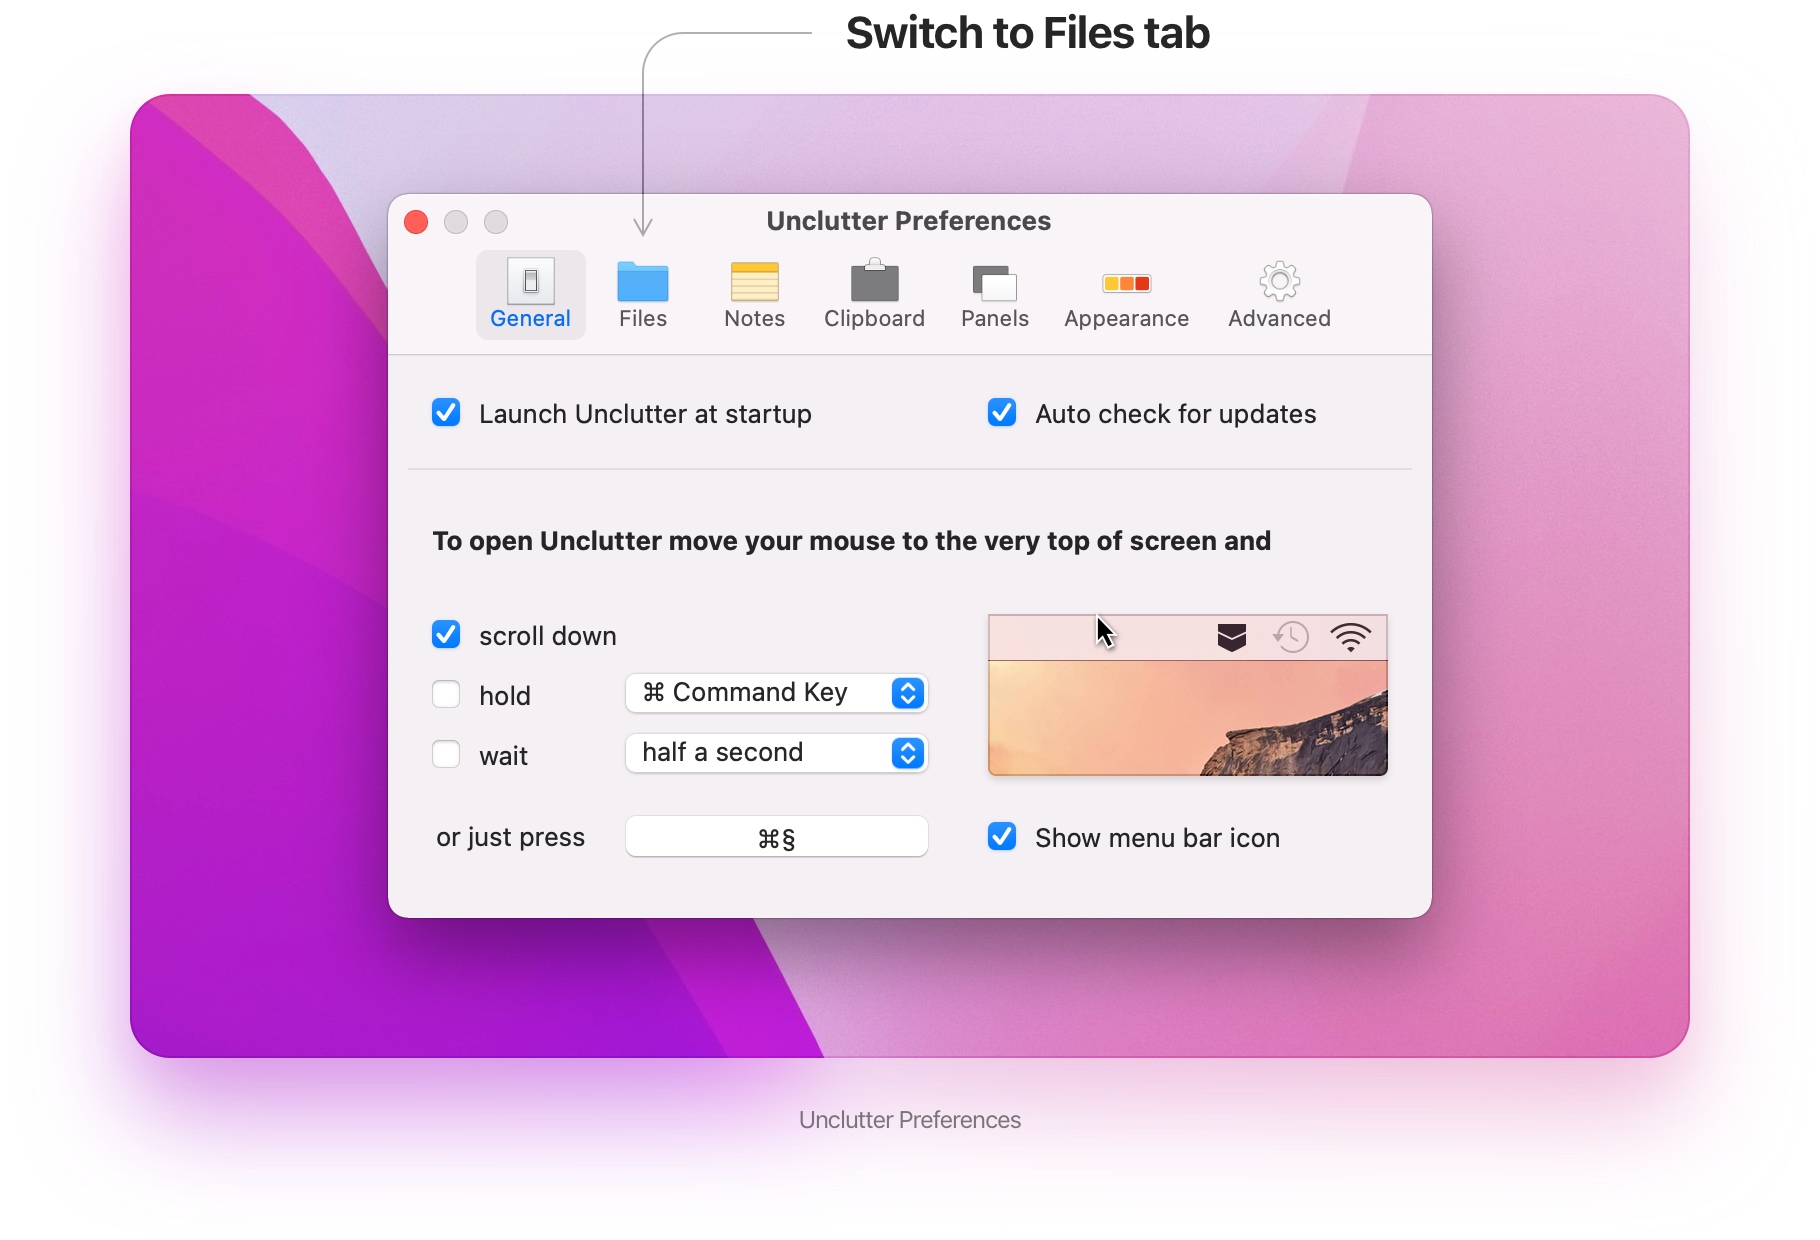
First, open Unclutter Preferences (via Unclutter icon in the menu bar or ⚙️ icon on the bottom red label).
Click on “Files” to switch to the corresponding section.
Once you are on the Files tab, click on the dropdown button to see all the available menu options.
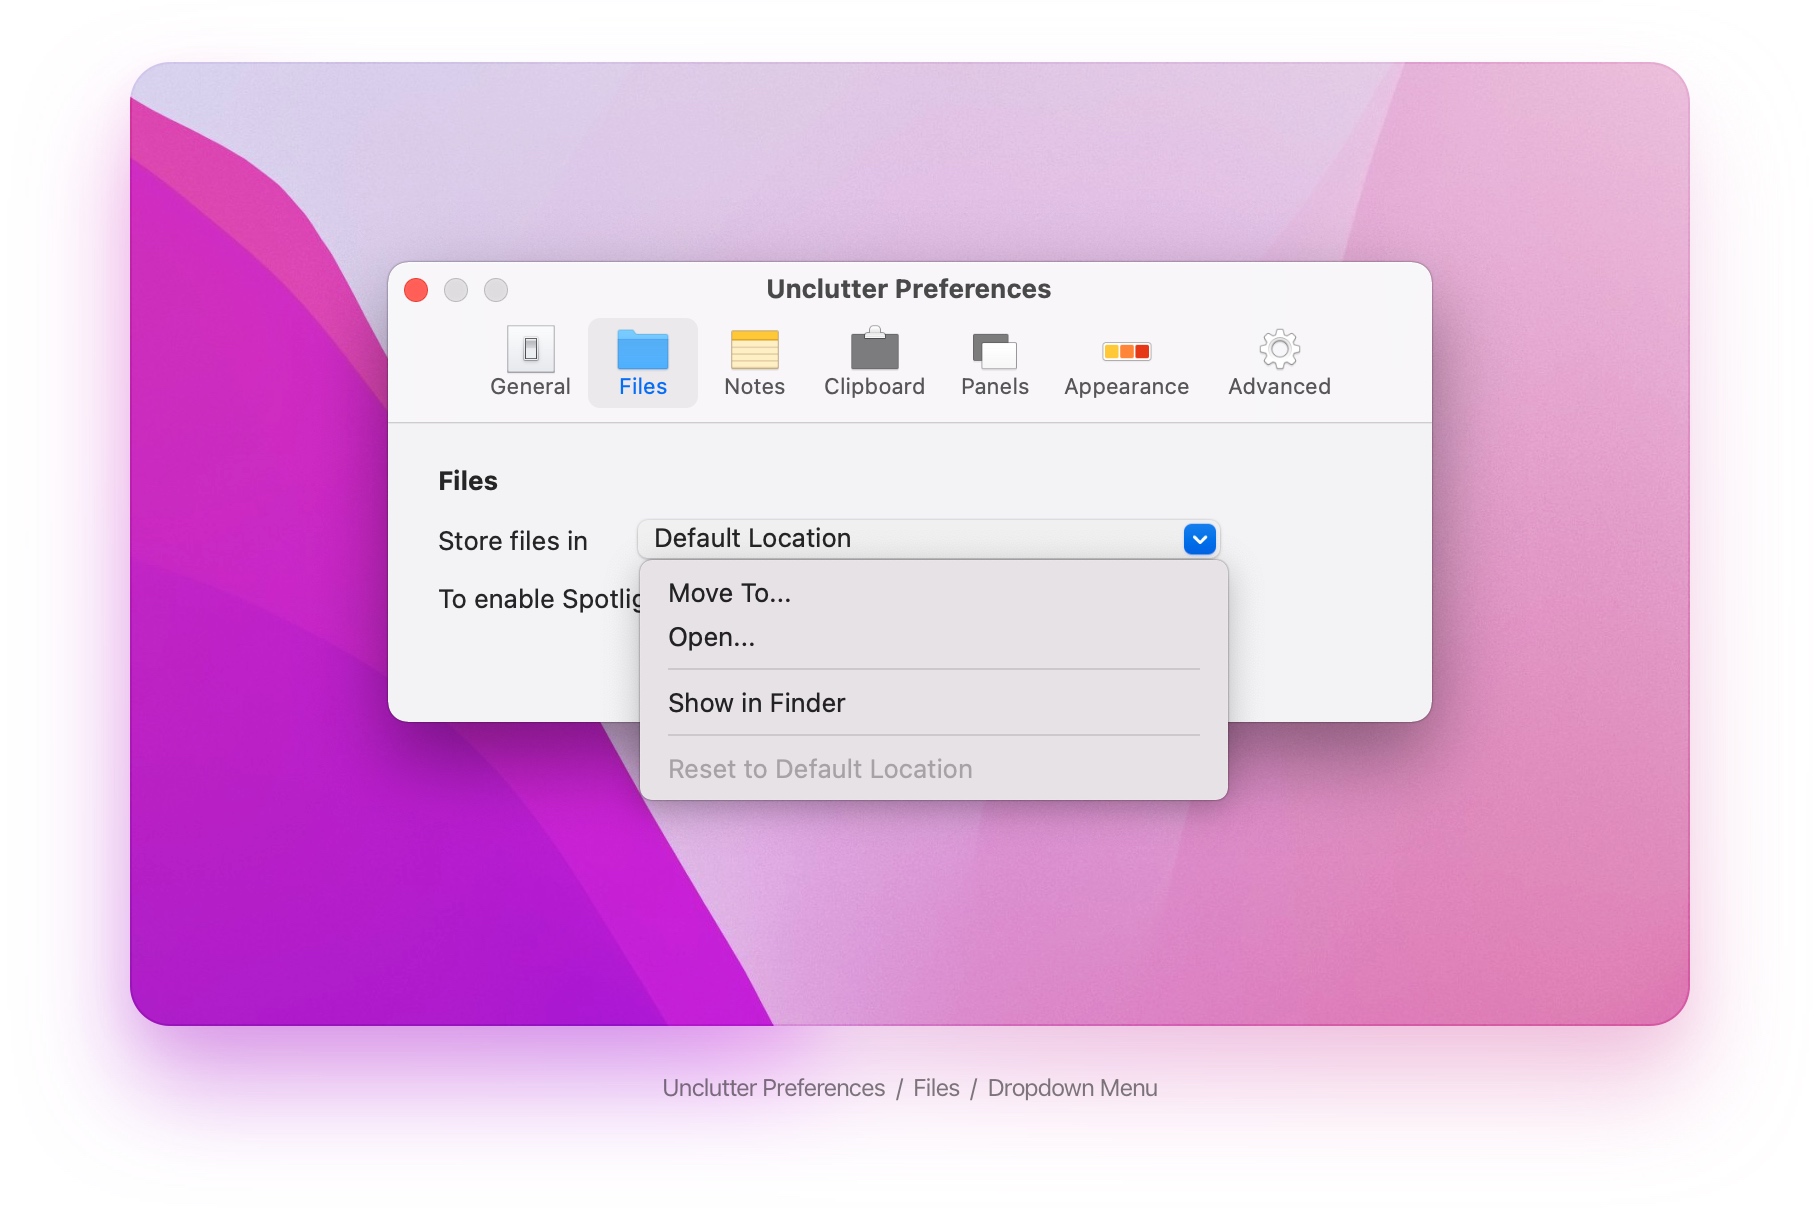
“Show in Finder” lets you quickly open your current storage folder in a new Finder window.
“Reset to Default Location” is available if you’ve already switched to your own folder. Use this option to easily reset the Unclutter’s panel storage back to its Default Location (without moving any files).
Right now we need the other two options:
“Open” command will let you pick a new folder to store your files in. Once you do that, Unclutter will switch and reload the content. Now the Files section will show all the files from your new storage location.
“Move To…” works in the same way. Except it will also move your existing files to the selected folder.
In this case, when you pick a new location, pay attention to the bottom Options box of the dialog window:
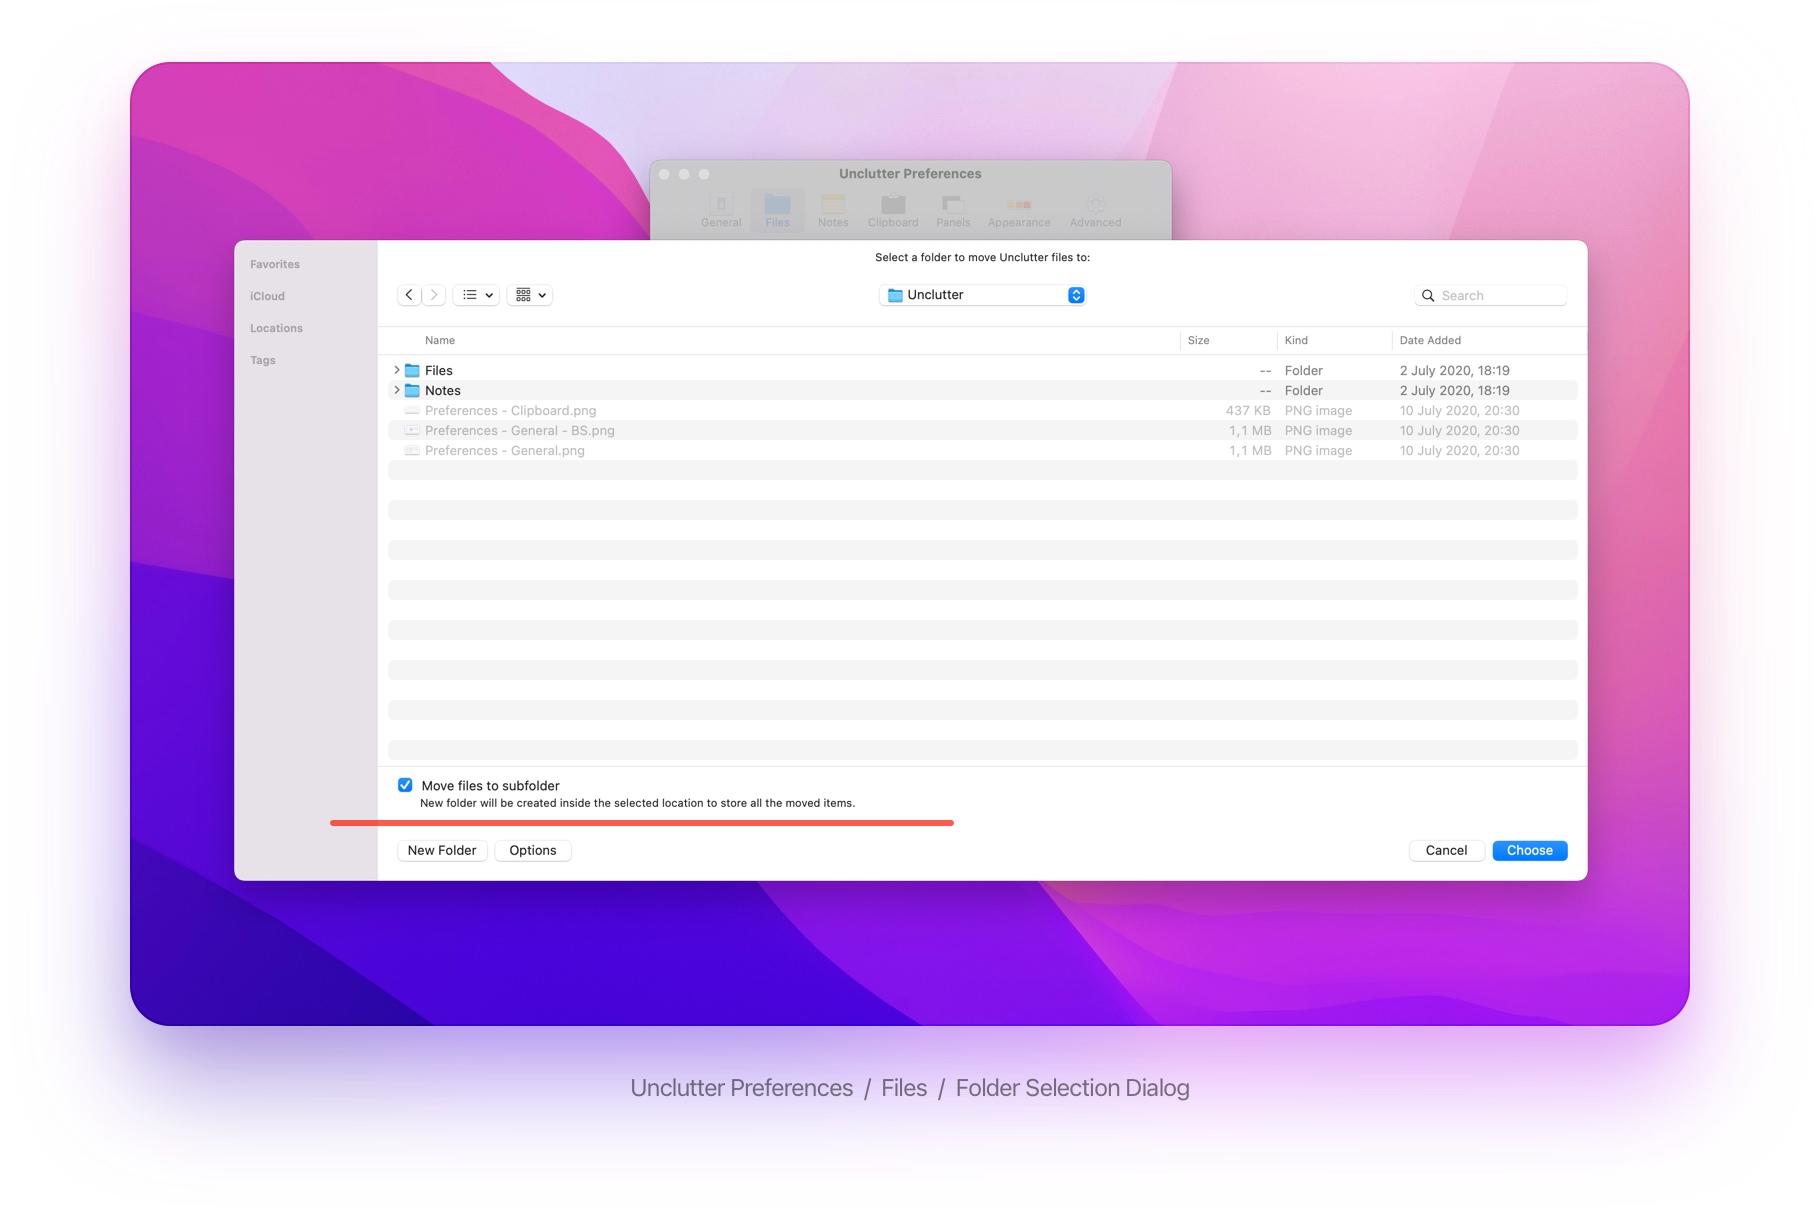
This bottom box will only show up if you click the “Options” button.
And it contains an important checkbox inside.
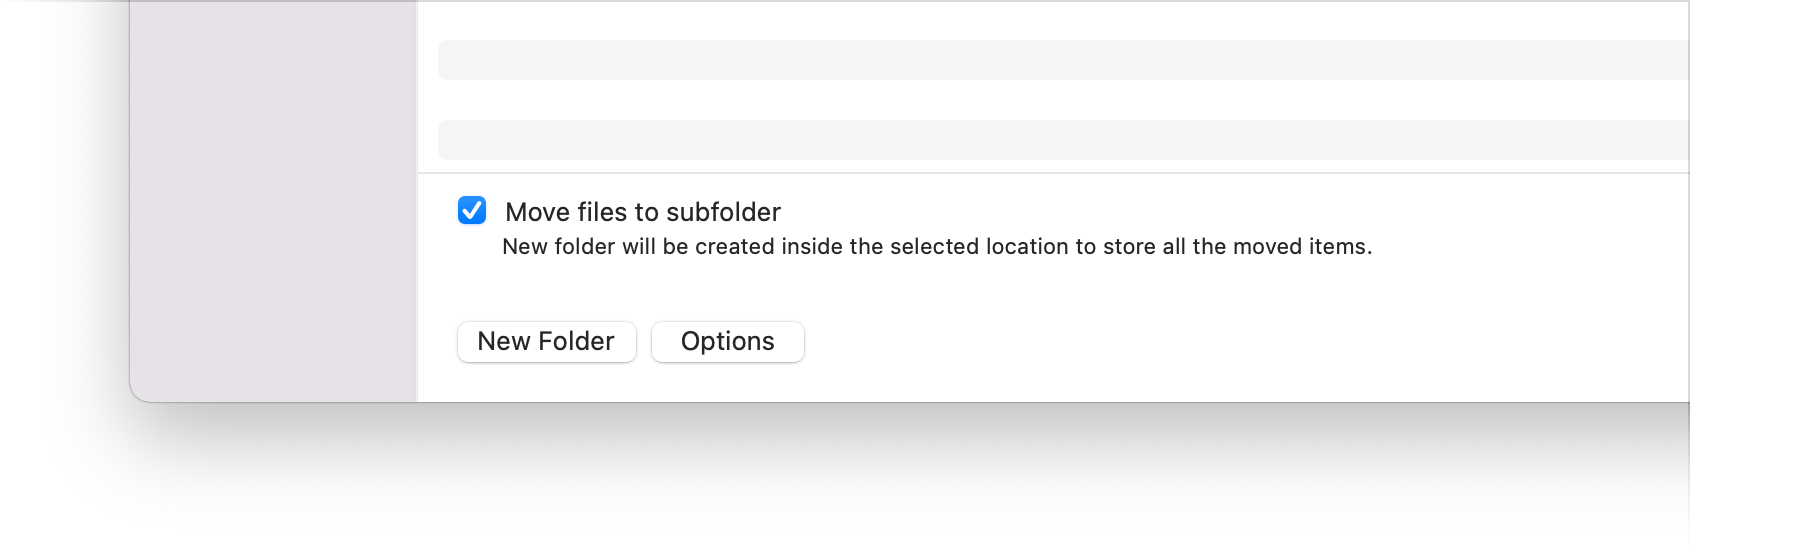
Note the “Move files to subfolder” option.
It is checked by default. And if you leave it that way, Unclutter will create a subfolder named “Unclutter Files” and move your data inside it. Now this subfolder will be your storage location.
This comes in handy when you pick a container (parent) folder to store all your Unclutter data inside.
For example, if you pick ~/Unclutter folder in this case, you will have a storage location for Files panel set up to ~/Unclutter/Unclutter Files
But if you want to pick a specific folder created for Unclutter Files, you should uncheck this option.
This is also important if you want your data to sync properly.
Done! Once you click the “Choose” button in the folder selection dialog, Unclutter changes the storage folder and moves your files.
NOTE #1:
It is no problem if you chose “Move To…” command while the target folder already contains some files.
Your Unclutter data from previous location will be simply added.
NOTE #2:
Always use different folders to store your Unclutter Files and Notes data.
Otherwise there may be issues and conflicts.
NOTE #3:
There is a possible bug when you pick a folder to set as a new Unclutter storage location:
Unclutter may become unresponsive.And while this only happens when you pick a new folder that you’ve never picked before, and you probably won’t change the storage location too often, it’s an annoying issue that prevents Unclutter from being closed.
If you got into this situation, please open Activity Monitor, find “Unclutter” process in the list and click “Stop” button on the toolbar. This will force-quit the app. Now launch Unclutter again. You will see that the new storage folder has been set up successfully, so you can go on normally.
We’re looking for a solution. And once it is fixed, I will remove this note.
Q: How do I sync my Unclutter data between devices
Please know that Unclutter doesn’t perform any sync tasks on its own. Instead, it utilizes the cloud sync functionality you have on your Mac. And it’s pretty simple to get your Unclutter Files and Notes synced between devices.
No matter which cloud drive you use – be it iCloud Drive, Dropbox, Google Drive or something else – it always has a folder/disk/volume on your file system.
Set up your Unclutter storage folders to be inside this cloud drive.
For example, you want to sync your Unclutter data via iCloud Drive:
- Create folders like these:
iCloud Drive/Unclutter/Files
iCloud Drive/Unclutter/Notes
- Open Unclutter Preferences and pick corresponding folders to be storage locations for Files and Notes.
Don’t forget about that “Move to subfolder” checkbox at the bottom of the dialog window. In this case you should uncheck it. - Once you do that, your data will start to sync automatically.
You can already access it on your iPhone or iPad via native Files app. - Now, on your second Mac, open Unclutter Preferences and set up storage folders identically.
It is important that you pick exactly the same folders for Files and Notes correspondingly.
Done! Now, when you use Unclutter and make changes on one Mac, it will automatically sync and update data on your other Mac (and all other devices, of course).
Like I said, this method is not limited to the built-in iCloud Drive. You can use Dropbox, Google Drive, or any other cloud drive. It will just work.
That’s it
Thanks for reading. If you have question or need help, please write me at support@unclutterapp.com