
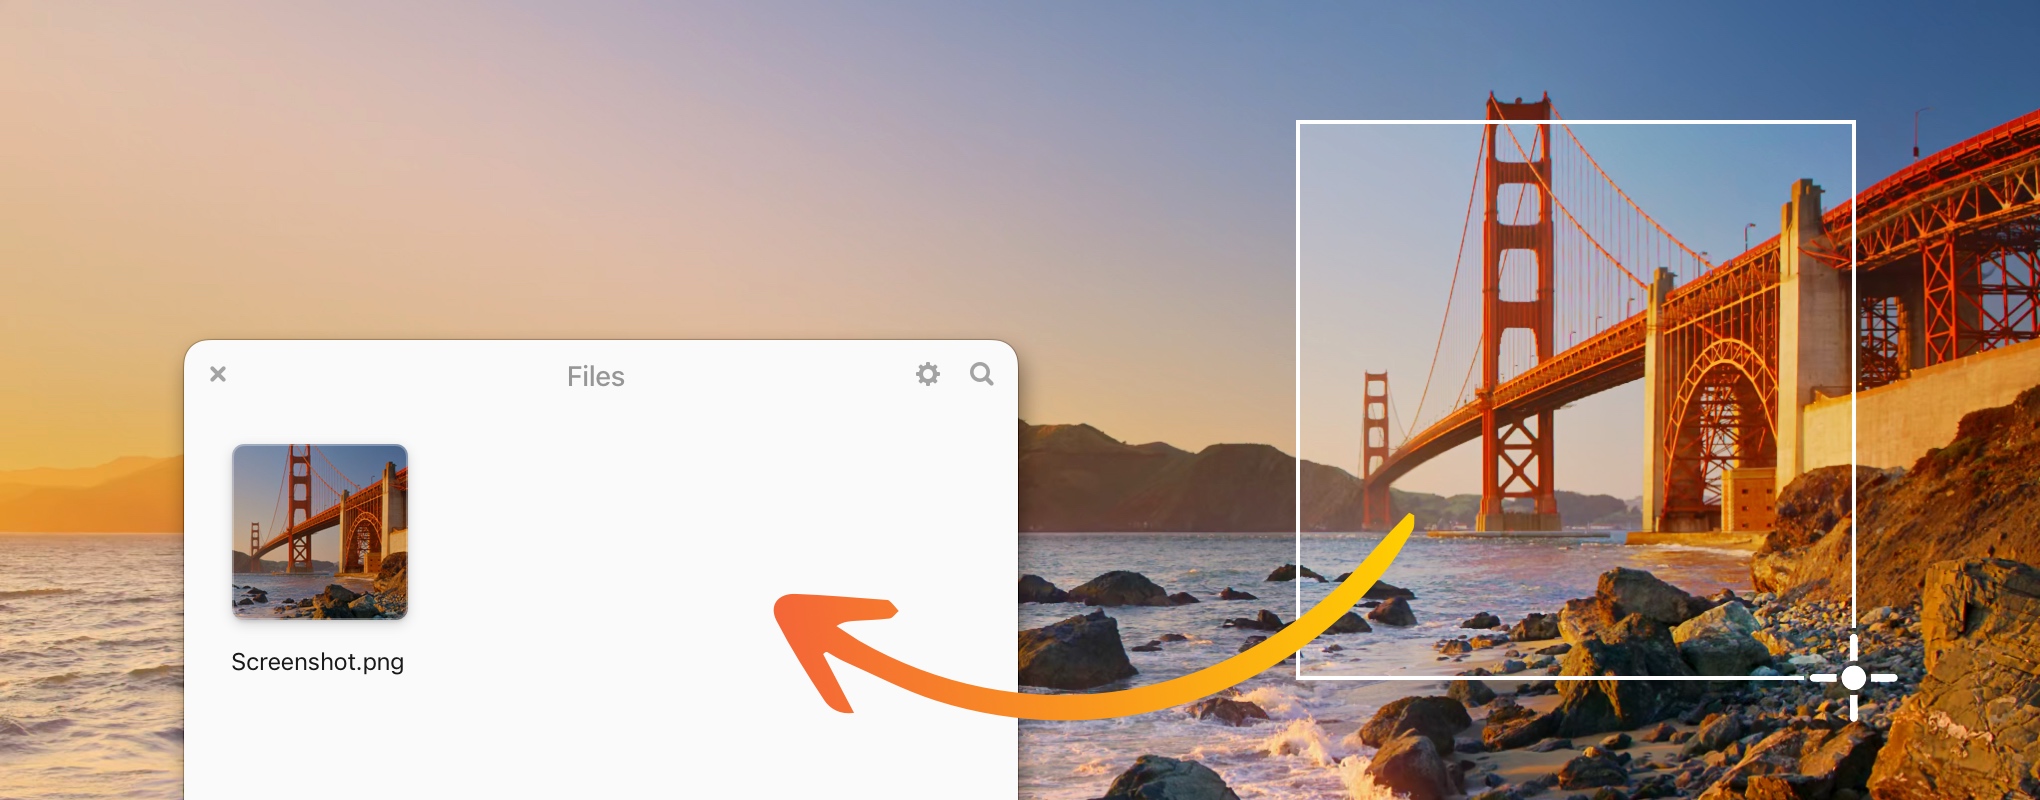
By default, macOS saves screenshots to your Desktop. It works well enough, but if you take screenshots regularly, they can quickly pile up among your other files.
Unclutter is a great place to keep them instead. You can have your Mac save screenshots directly to Unclutter Files, keeping your Desktop clear and your screenshots easily accessible from the top of your screen — ready to preview, share, or drag into another app whenever you need them.
Here’s how to set it up.
Option 1: Enable it in Unclutter (Website and Setapp editions)
If you downloaded Unclutter from our website or use it through Setapp, there’s a built-in option that takes care of everything.
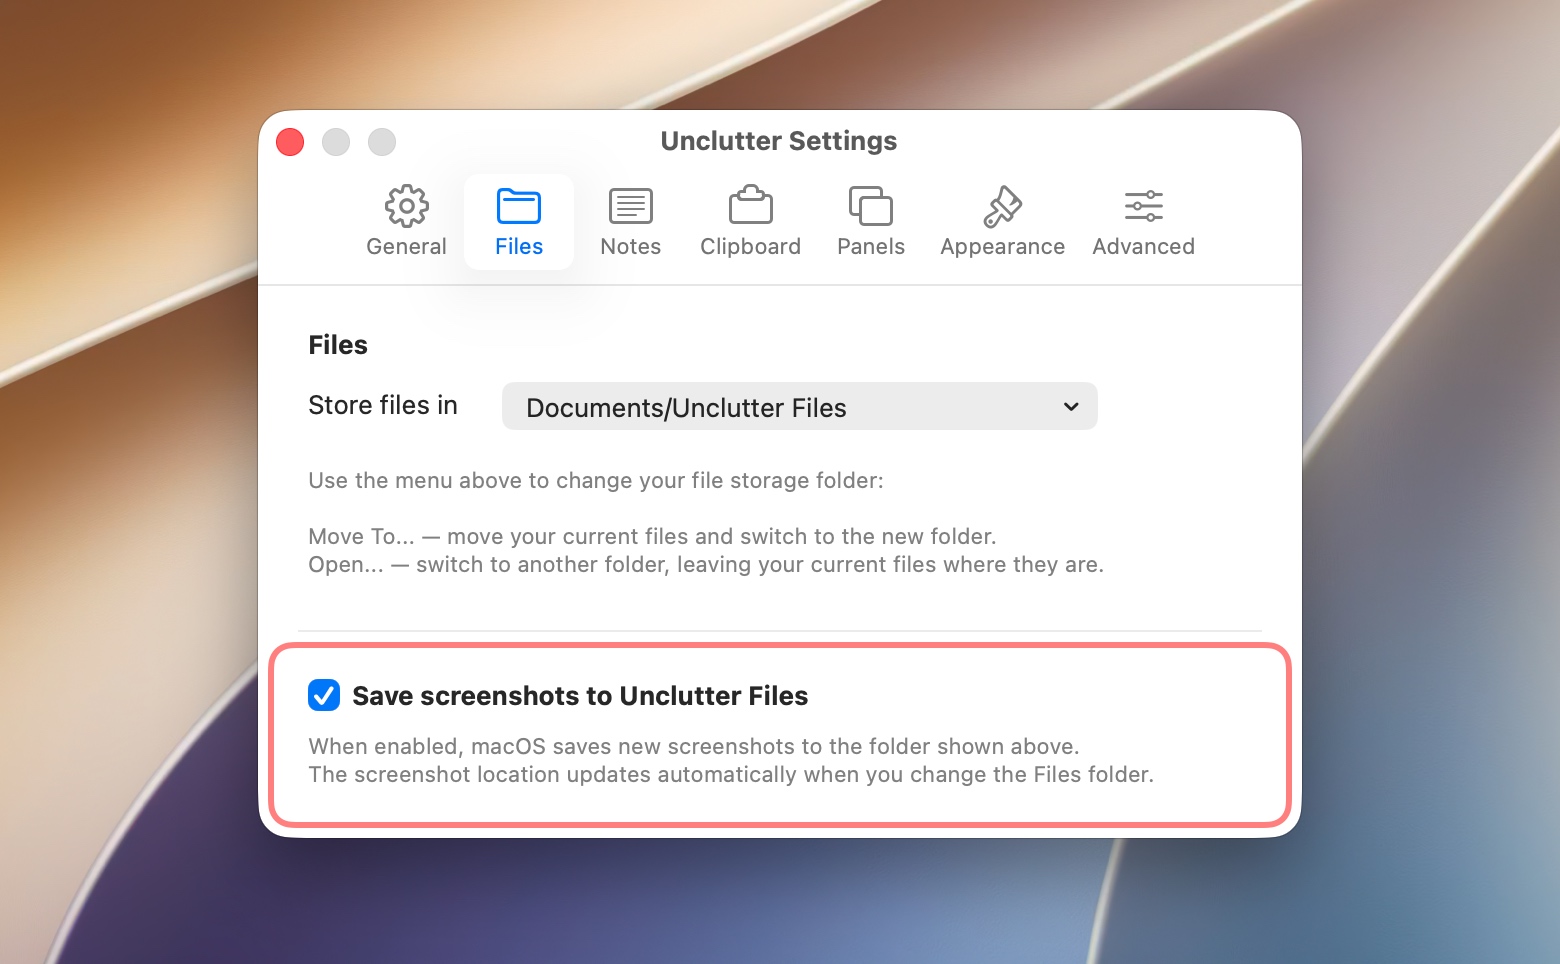
- Click the Unclutter icon in your Mac’s menu bar and choose Settings…
- Open the Files tab.
- Enable Save screenshots to Unclutter Files.
That’s all you need to do.
From now on, new screenshots will be saved directly to your Unclutter Files folder instead of the Desktop.
The save location is linked to the folder selected under Store files in.
If you change that folder later, Unclutter will automatically update the screenshot save location as well.
To check that everything works, press Shift-Command-3 to take a screenshot, then open Unclutter Files. You should see your new screenshot there.
Option 2: Set it up manually (Mac App Store version)
If you’re using the Mac App Store version of Unclutter, you can achieve the same result by changing where macOS saves your screenshots.
The trick is to use the same folder for both macOS screenshots and Unclutter Files. Here’s how:
- Find your Unclutter Files folder.
Open Unclutter Settings → Files. Under “Store files in”, choose “Show in Finder” to locate your current folder.
You can also select “Open…” to choose a different folder or create a new one, such as “Unclutter Files” inside /Documents. - Open the Screenshot toolbar.
Press SHIFT+COMMAND+5 on your keyboard. A toolbar with screenshot controls will appear near the bottom of your screen. - Change the screenshot save location.
Click “Options” on that toolbar, then under “Save to”, choose “Other Location…” and select the folder you use for Unclutter Files. - Check the result.
Take a screenshot with SHIFT+COMMAND+3 and open Unclutter Files. Your screenshot should appear there.
Your Mac will now save new screenshots to the folder used by Unclutter Files, making them available directly from the Files panel.
One thing to remember: unlike the built-in option described above, this setup doesn’t update automatically.
If you change your Unclutter Files folder, you’ll also need to select the new location in the macOS Screenshot toolbar.
Note: The Screenshot toolbar is available on macOS Mojave (10.14) and later.
Bonus tip: Make screenshots appear faster
You might have noticed the small thumbnail that appears in the bottom-right corner of your screen after taking a screenshot.
It’s a macOS feature that lets you quickly preview, edit, or share your capture. However, while that thumbnail is visible, macOS may delay saving the actual screenshot file.
If you’d rather have your screenshots available in Unclutter Files right away, you can disable this preview:
- Press SHIFT+COMMAND+5 to open the Screenshot toolbar at the bottom of your screen.
- Click “Options” on the toolbar.
- Turn off “Show Floating Thumbnail“.
With the floating thumbnail disabled, screenshots are saved without that extra delay, so you can access them in Unclutter Files almost immediately.