A list of features, tips & tricks
for even more simple and productive workflow.
You’ve already been using Unclutter for quite some time and think you know everything about its functionality?
Maybe you’ve tried the app once, didn’t get it and never came back to it?
Or you simply never used Unclutter before?
Doesn’t matter. Today we are going to show you some goodies you could have missed or never knew existed in Unclutter. Including a few popular issues addressed by our users, so you could easily solve them as well.
Without more ado, here they are.
1. Have Unclutter Launched at Startup
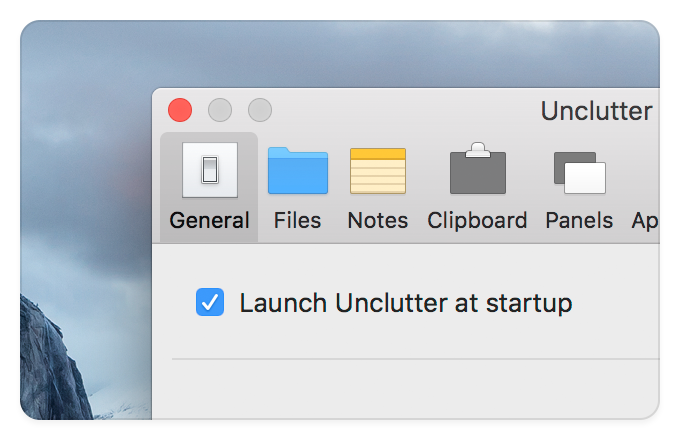 Even though it may seem to be obvious, this one is worth to start with. Just in case for some reason Unclutter doesn’t launch automatically at your Mac startup, you have all arguments in favor of it.
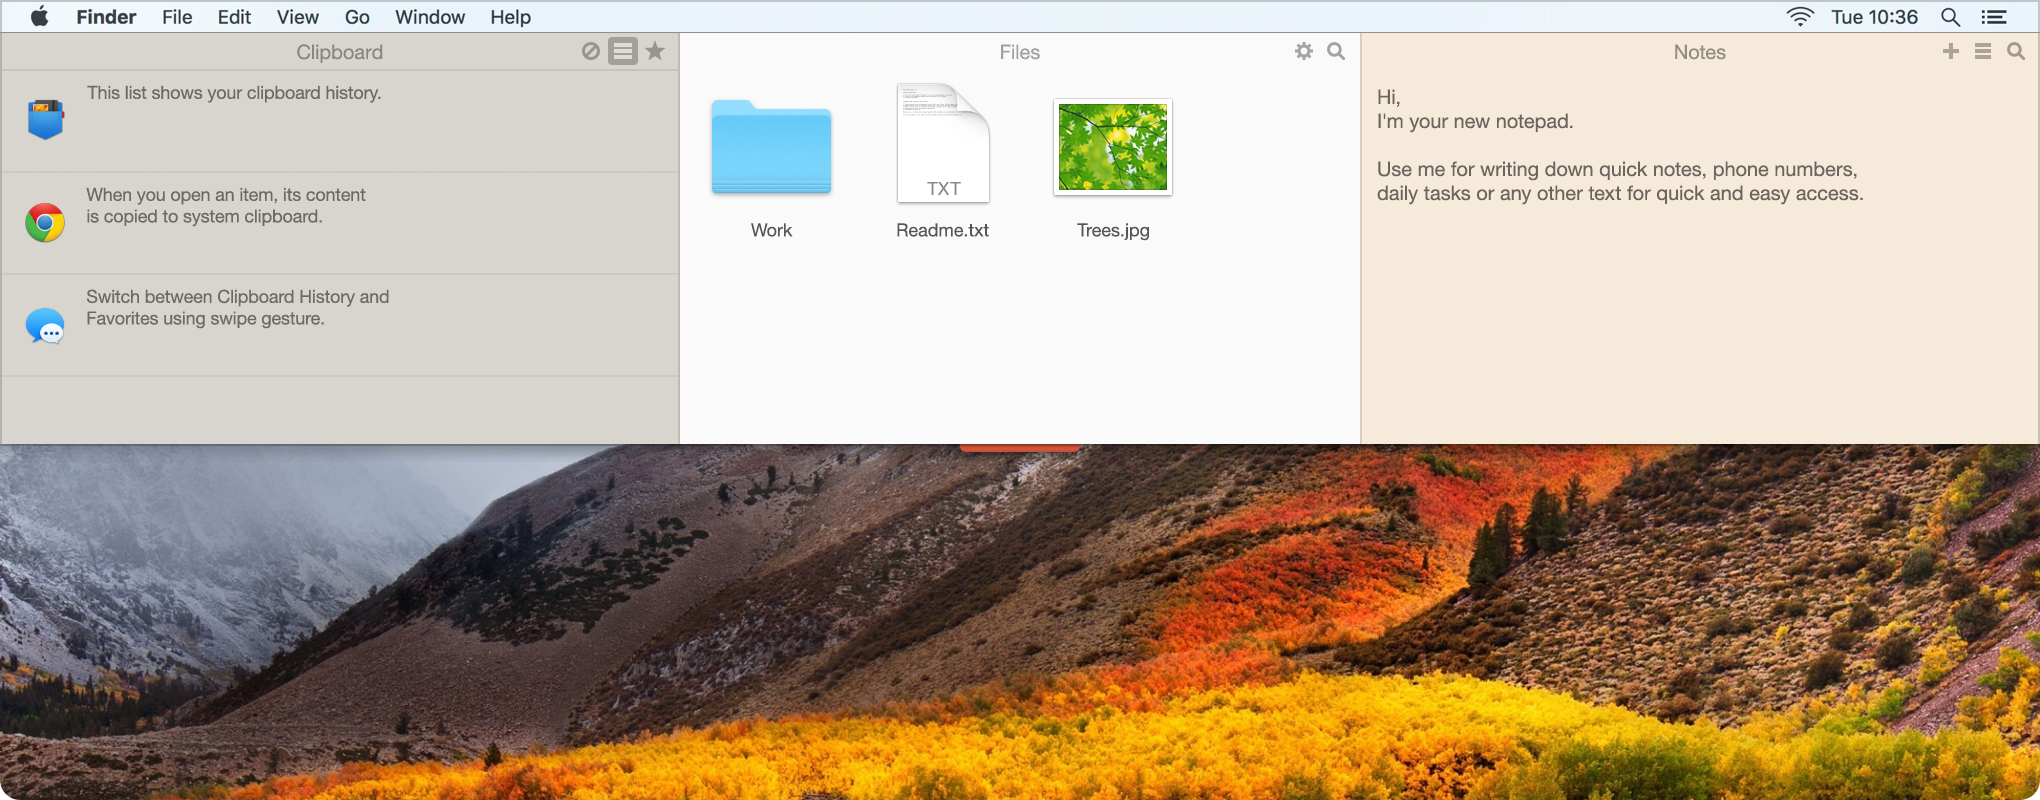
The whole idea of Unclutter is that it’s always at hand while you’re at your Mac.
You can do your stuff while Unclutter window rests hidden above your Desktop. The moment you need to access Mac clipboard history, drag and drop a file or jot down a note – Unclutter is at your service. Instantly.
2. Store Files & Notes Where You Wish Them to Be
Set your own place on Mac for storing everything from Unclutter Files & Unclutter Notes.
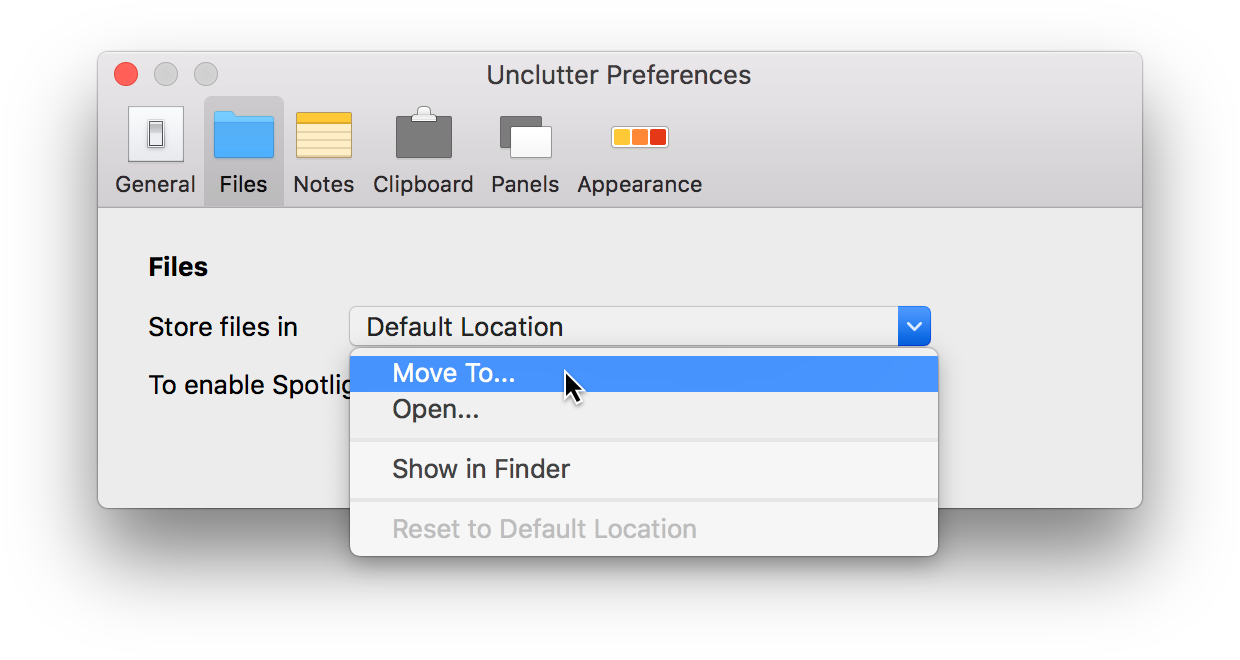
Once you did it, you know where all your files and notes are kept. Easily locate them on your Hard Drive or in Time Machine backup, auto-sync data (about that later on) and all kinds of things.
What’s more, your data will become available for Spotlight Search.
Thus, we even recommend you to change the standard storage folder to your own one right after you start using the app – for your convenience.
3. Different Ways to Open the Unclutter Window
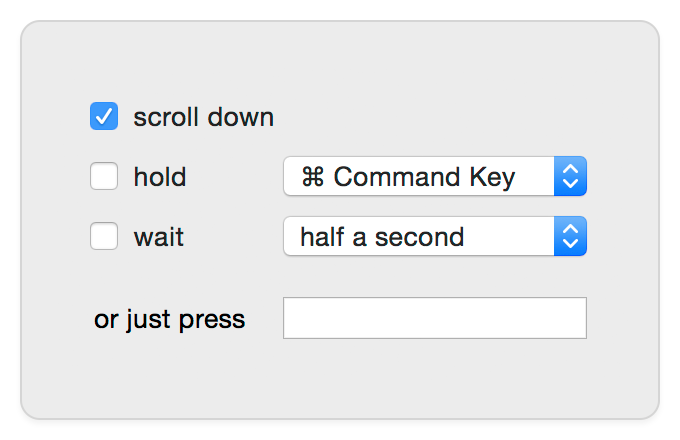 Choose between four different ways of how to open the Unclutter window. In the first three, you move your mouse to the very top of the screen and:
- scroll down
- hold a selected modifier key (Command, Option, Control or Shift)
- wait for a selected period of time (0.5, 1 or 2 seconds)
- or just press the key shortcut you’ve set yourself
The first method (with scrolling down) is set as default since we believe it to be the most optimal way to open the window. The other methods may come in handy depending on your setup and the way you use your Mac.
4. Keyboard Shortcuts & Gestures
There are useful key combinations for various operations in Unclutter. Here is the short list:
Files
⌥ Option (hold while dragging) – make a copy (instead of default “move” operation)
⌘ Cmd + ⌥ Option (hold while dragging) – create aliases (for all dragged items)
⌘ Cmd + ↓ Down – open a selected file(s)
⌘ Cmd + I – get info on a selected file(s)
Enter – rename a file
Space – Open QuickLook for the selected item(s).
Clipboard
Pinch-zoom – switch between a single clip and the list.
← Left / → Right arrow keys or Left/Right swipe – switch between Clipboard History and Favorites.
Enter / Space – Open the selected clip.
ESC – quickly switch from a single clip view back to list.
Notes
Pinch-zoom – switch between a single note and the list.
⌘ Cmd + N or ⌘ Cmd + T – create a new note.
Enter / Space – Open the selected note.
ESC – quickly switch from a single note view back to list.
You can also use arrow keys to navigate through the elements in the list of any panel. Home/End keys will bring you to the beginning or the end of the list respectively.
5. Resizable Panels
 Easily adjust the width of all three panels by dragging the splitting line between them. Alter the height of the Unclutter window by pulling its red label at the bottom.
In this way, some panels may occupy less space if you don’t use them a lot – allowing more room for the others.
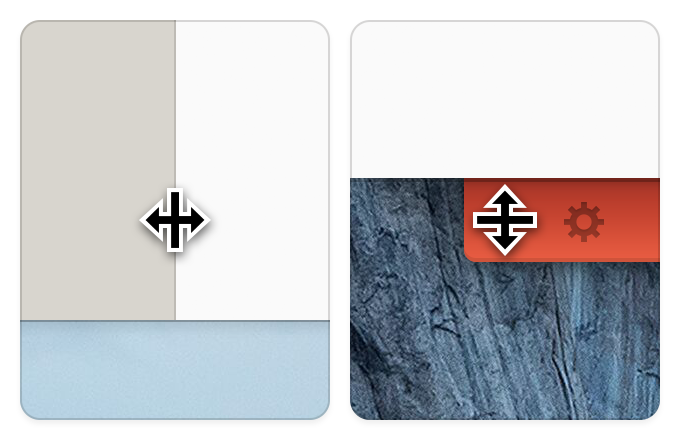
6. Draggable Panels
 Swap panels if you like. For that, you just grab one for its title area and drag it to the place you prefer.
What’s more, each panel can easily be dragged out onto your Desktop, on the top of other windows. The moment it becomes no longer necessary, you just close the panel and it docks back to its usual place.
7. Enable & Disable the Panels
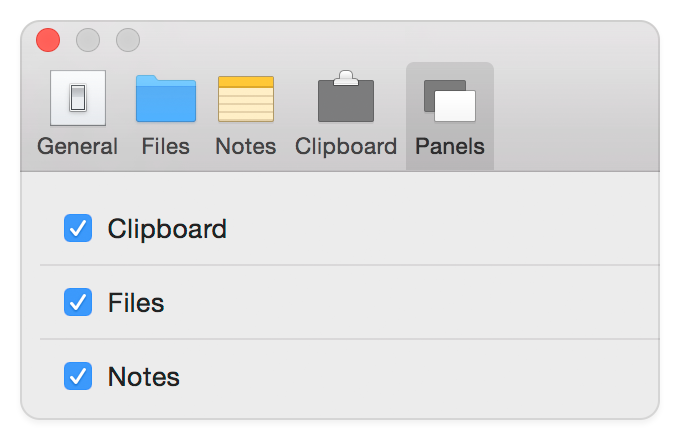 In addition to the previous actions with the Unclutter panels, there is one more basic thing you can do – enable or disable them.
You can leave only those panels you really need and use frequently. So these essential ones will have even more room to display valuable content.
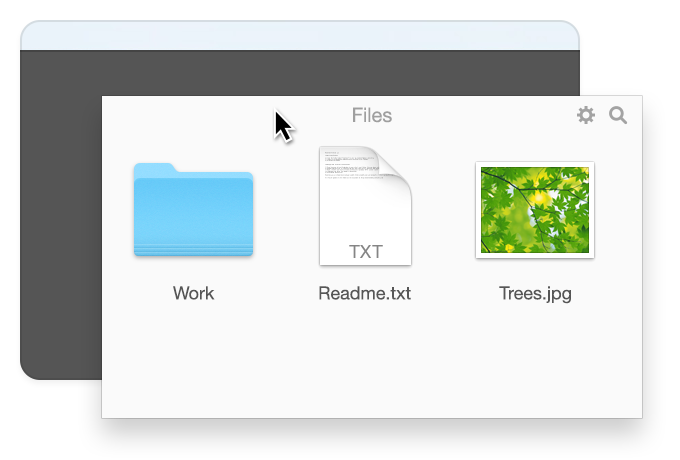
8. Drag & Drop All You May Need
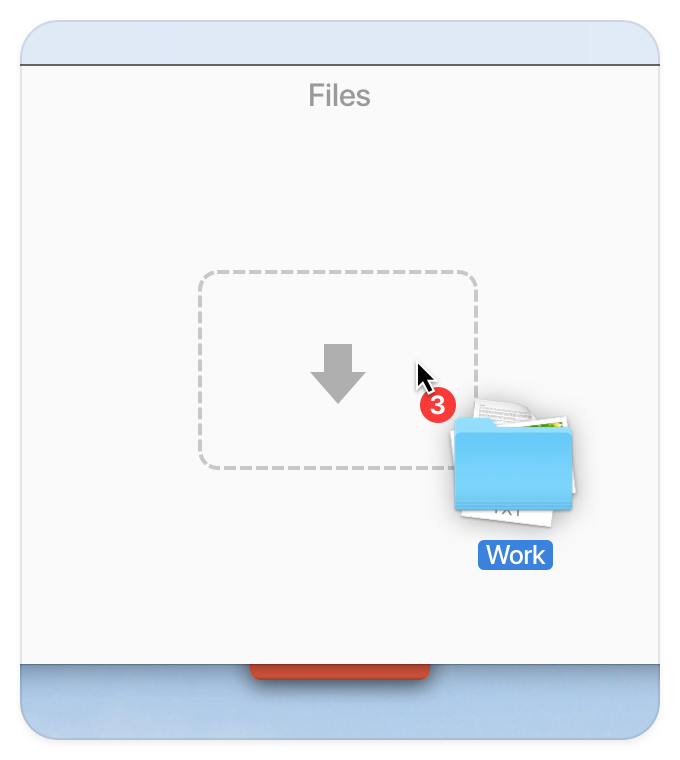 Did you know that you can drag and drop virtually everything from everywhere into Unclutter Files drop zone?
Starting with local files from your Mac Desktop, other apps, Spaces and connected screens and ending with remote files (images from web browser, etc).
Not that we recommend you to clutter Unclutter with all that’s possible (would be illogical, agree?) – it just can be done in case you need it.
Drag and drop wisely. ?
9. Retrieve Plain Text From Various Formatted Pieces
This is a nice trick our team likes to employ which may come of a good use for you.
Unclutter Notes allows you to remove the formatting of different texts, lists, tables, graphs, etc. You simply copy that piece from the Internet or any document and paste it in a new note – you’ll get your pure formatting-free text.
Ideal when you just need to get rid of unwanted formatting.
Personally, I also like to toy with various tabs and links from the Web by throwing them to Notes. There they are safe and sound, stored as hyperlinks (the only kind of formatting that is kept).
10. Save Screenshots Right to Unclutter Files

Sounds to be quite convenient, right? It is.
In the upcoming big update of the Unclutter app, we plan to make that a built-in function. But for now, it can easily be done in a few steps.
Here is a brief but detailed guide of how you can make your screenshots be auto-saved in Unclutter Files:
(skip the first 2 steps if you’ve already set your own storage location for Unclutter Files)
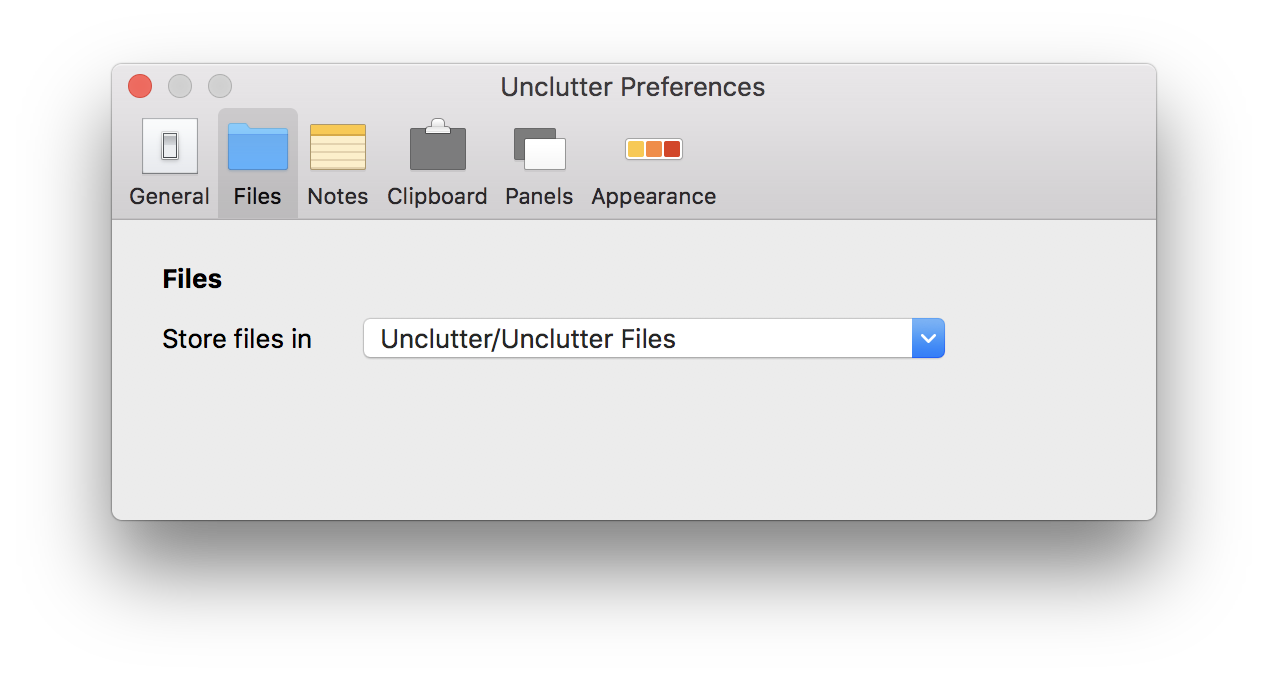
- Go to Preferences in Unclutter menu;
- In Files tab, choose where to store files by creating your own folder (like “Unclutter”) in your home folder. You’ll get something like this:
- Launch the system Terminal app on your Mac and paste the following:<br/ >
defaults write com.apple.screencapture location “~/Unclutter/Unclutter Files“(where ~ means your user home folder and after it goes the path you have set earlier for Unclutter Files storage)
- Press Enter.
- Now we need to apply the changes we’ve made. Paste one more command in Terminal:
killall SystemUIServer - Press Enter.
So, you’ve just specified your own Unclutter Files storage folder and changed the screenshot path (in the Terminal app) to have those in Unclutter Files.
Alternatively, you can adjust the path to save your screenshots to something like “~/Unclutter/Unclutter Files/Screenshots” and have them all in a subfolder inside Unclutter Files panel.
***
Note: Just in case you decide to reset the screenshots storage location back to defaults, enter these commands in Terminal:
defaults write com.apple.screencapture location ~/Desktop/
[Press Enter]killall SystemUIServer
[Press Enter]
11. Available on All Mac Desktops & Screens
 For some people, it is extremely important that an app be available on their numerous Desktops (Spaces) and displays. Unclutter supports such a feature from its very first launch on your Mac, by default.
Drag and drop files between applications with the Files drop zone, manage your clipboard and write notes on different Spaces or screens you have. Unclutter will be ready for service from above any of your Desktops.
And your workflow is kept smooth, with no boundaries.
12. Mission Control & Unclutter
![]() Some of us may have encountered accidental opening of Mac’s Mission Control while dragging files to the Unclutter Files panel (i.e. to the very top of the screen). There is an elementary solution to this.
Some of us may have encountered accidental opening of Mac’s Mission Control while dragging files to the Unclutter Files panel (i.e. to the very top of the screen). There is an elementary solution to this.
Even though Unclutter already has a small preventer to save you from opening Mission Control accidentally while dragging, it is still possible you’ll get into the MC windows management interface.
In this case, while you’re still dragging, simply press ESC key and you’ll get back to your screen and the opened Unclutter window to finish your drag & drop action.
13. Auto-Sync in Your Mac Ecosystem
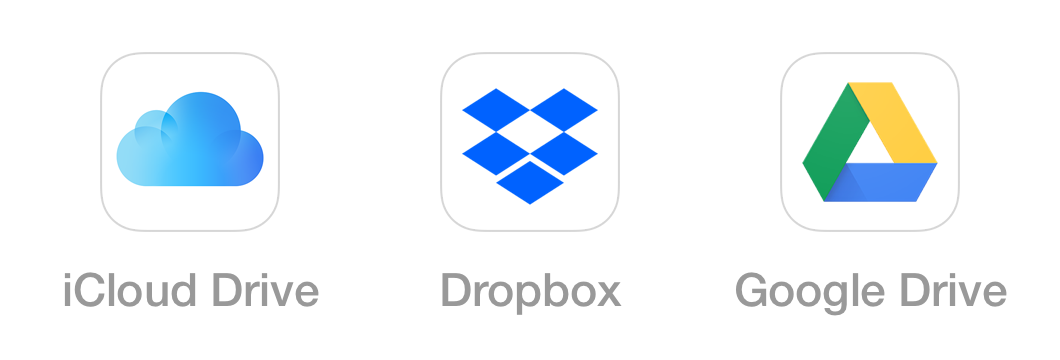
If you want your Unclutter content to be auto-synced between all of your Macs, surely go for it. All you have to do is set your files and notes storage in a shared folder (e.g. iCloud Drive, Dropbox).
Thus, you get the same Unclutter stuffing in all your synchronized devices. Just remember to set up the same storage folders on your other Macs.
14. Sensitive Data
In Unclutter Clipboard, there is one nice feature we call Sensitive Data. The idea is that your secret data (passwords, codes, private info) can be hidden in the panel from other people’s eyes.
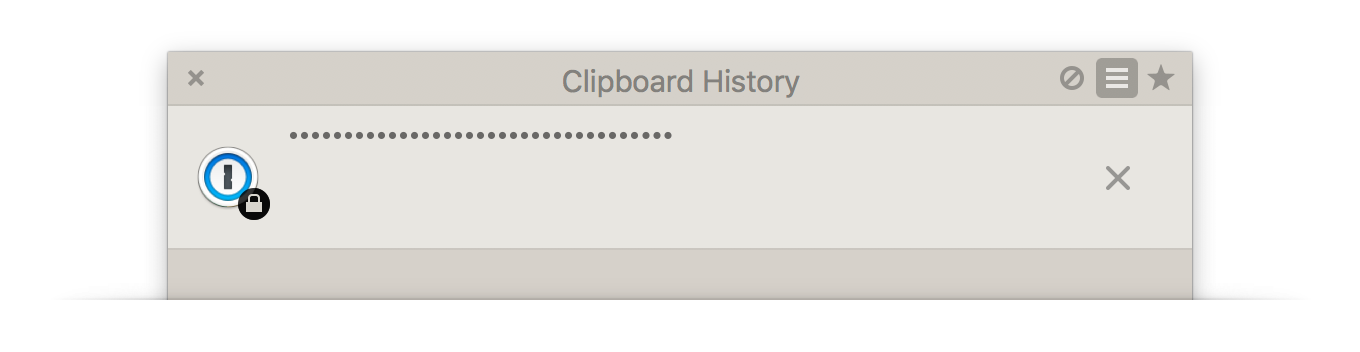
You just have to set in Preferences (Clipboard tab) from which applications you choose not to show your data. And such clips appear in Clipboard History disguised with dots (text clips) or lock image (other data).
Some apps (like 1Password) mark the copied data as “sensitive” by themselves. Unclutter identifies such data and conceals it automatically.
15. Improving Clipboard Usability
As you may know, selecting a clip in the list will copy the data to the system clipboard so you’re ready for paste. But at the same time, this clip opens to reveal its full content.
When you pasted the content and need another clip from the list, you will have to switch to the list mode first (by default, the previously opened clip will be shown).
Although you can hit ESC key and quickly switch back to your list, it is an extra step that can be eliminated. To do that, open Unclutter Preferences (Clipboard tab) and set the option named “Clipboard opens with” to “History”.
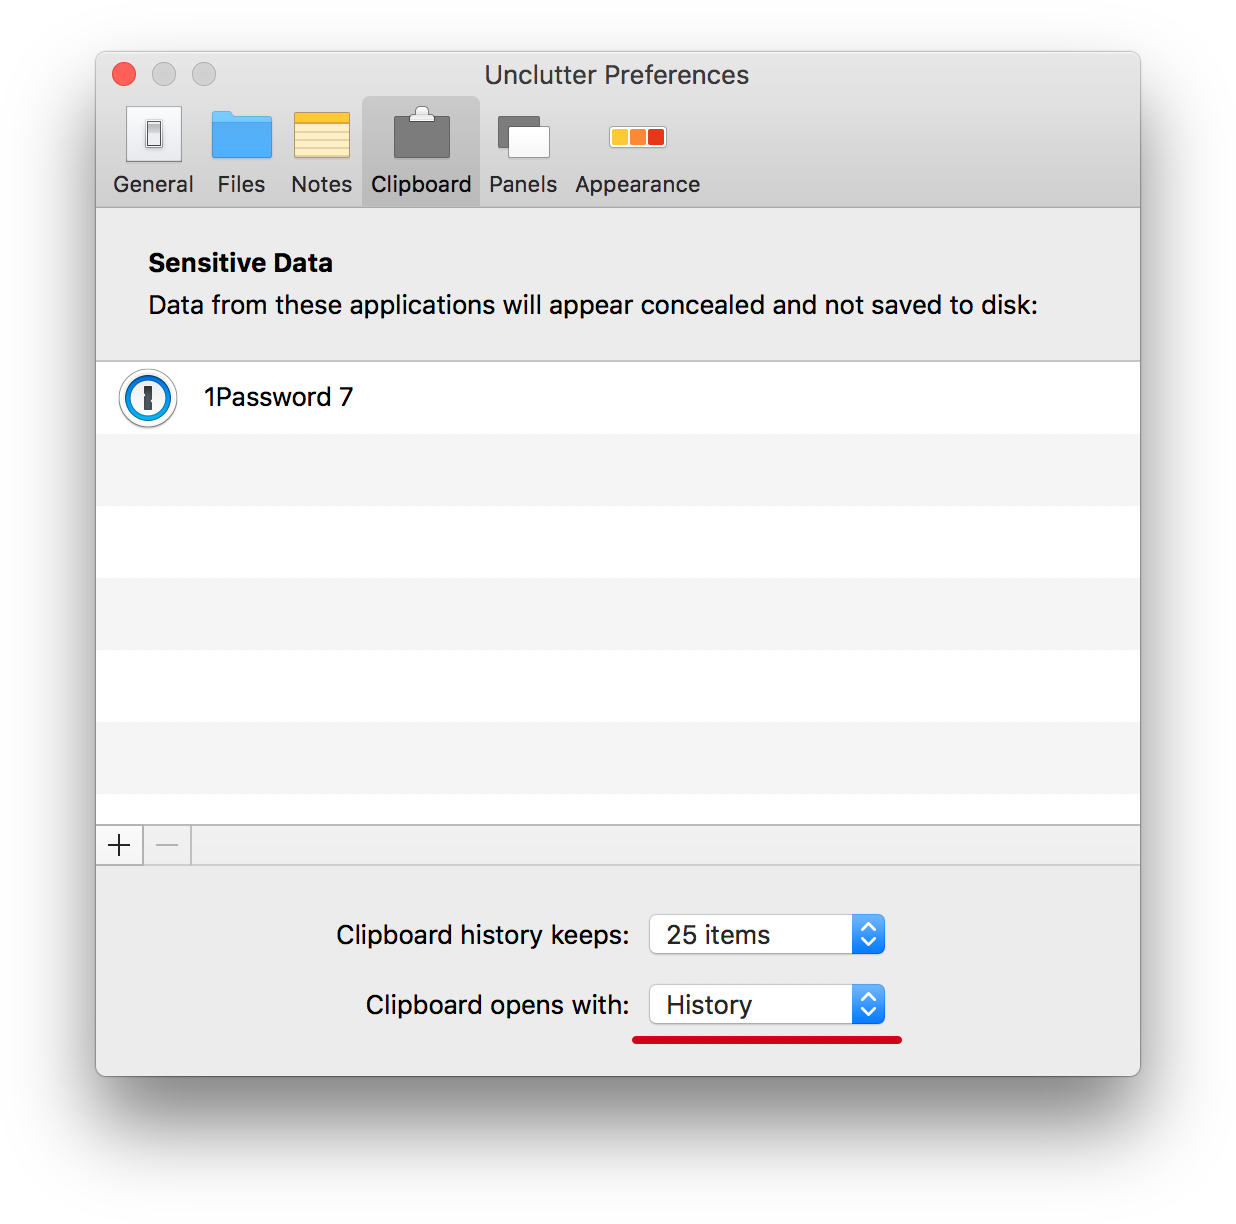
Now each time you open Unclutter window, the Clipboard panel will show the list (Clipboard History). All you have to do is pick the clip you need to copy.
To sum up
We’ve compiled these 15 useful Unclutter hacks and features together for your convenience and quick reference. You can save this article and return back later to check the described tips in practice.
Panels flexibility, changeable storage locations, keyboard shortcuts, multi-screen, auto-sync… and beyond. As you can see, Unclutter has more to it than it may seem at first sight.
We hope this article will help you get even more productive. ?
P.S. Unclutter turns out to be helpful in so many ways. And if you have found your own interesting use cases of Unclutter – we’d love to hear about them!
Drop us a few lines of your experience here:
feedback@unclutterapp.com