Tired of Your Messy Desktop?
Learn How to Remove Temp Files
& Find a Proper Place for Them.
You must be familiar with the situations when you have lots of temporary files to deal with on your Mac. Folders, documents, pictures, screenshots…
Your Desktop is cluttered, files are scattered all over the place. Quite often, it happens on the daily basis. Sooner or later you find yourself in the middle of a hot workflow with plenty of stuff piled up everywhere and no desire to cope with it.
No doubt you’d like to clear up and optimize your Mac space so you could perform your best while doing any kind of task on it. But you wonder how? Let’s see how you can make it possible.
If you have ever asked yourself How to clean up my Mac Desktop? or Where to store temporary files on Mac? — we definitely have something of use for you.
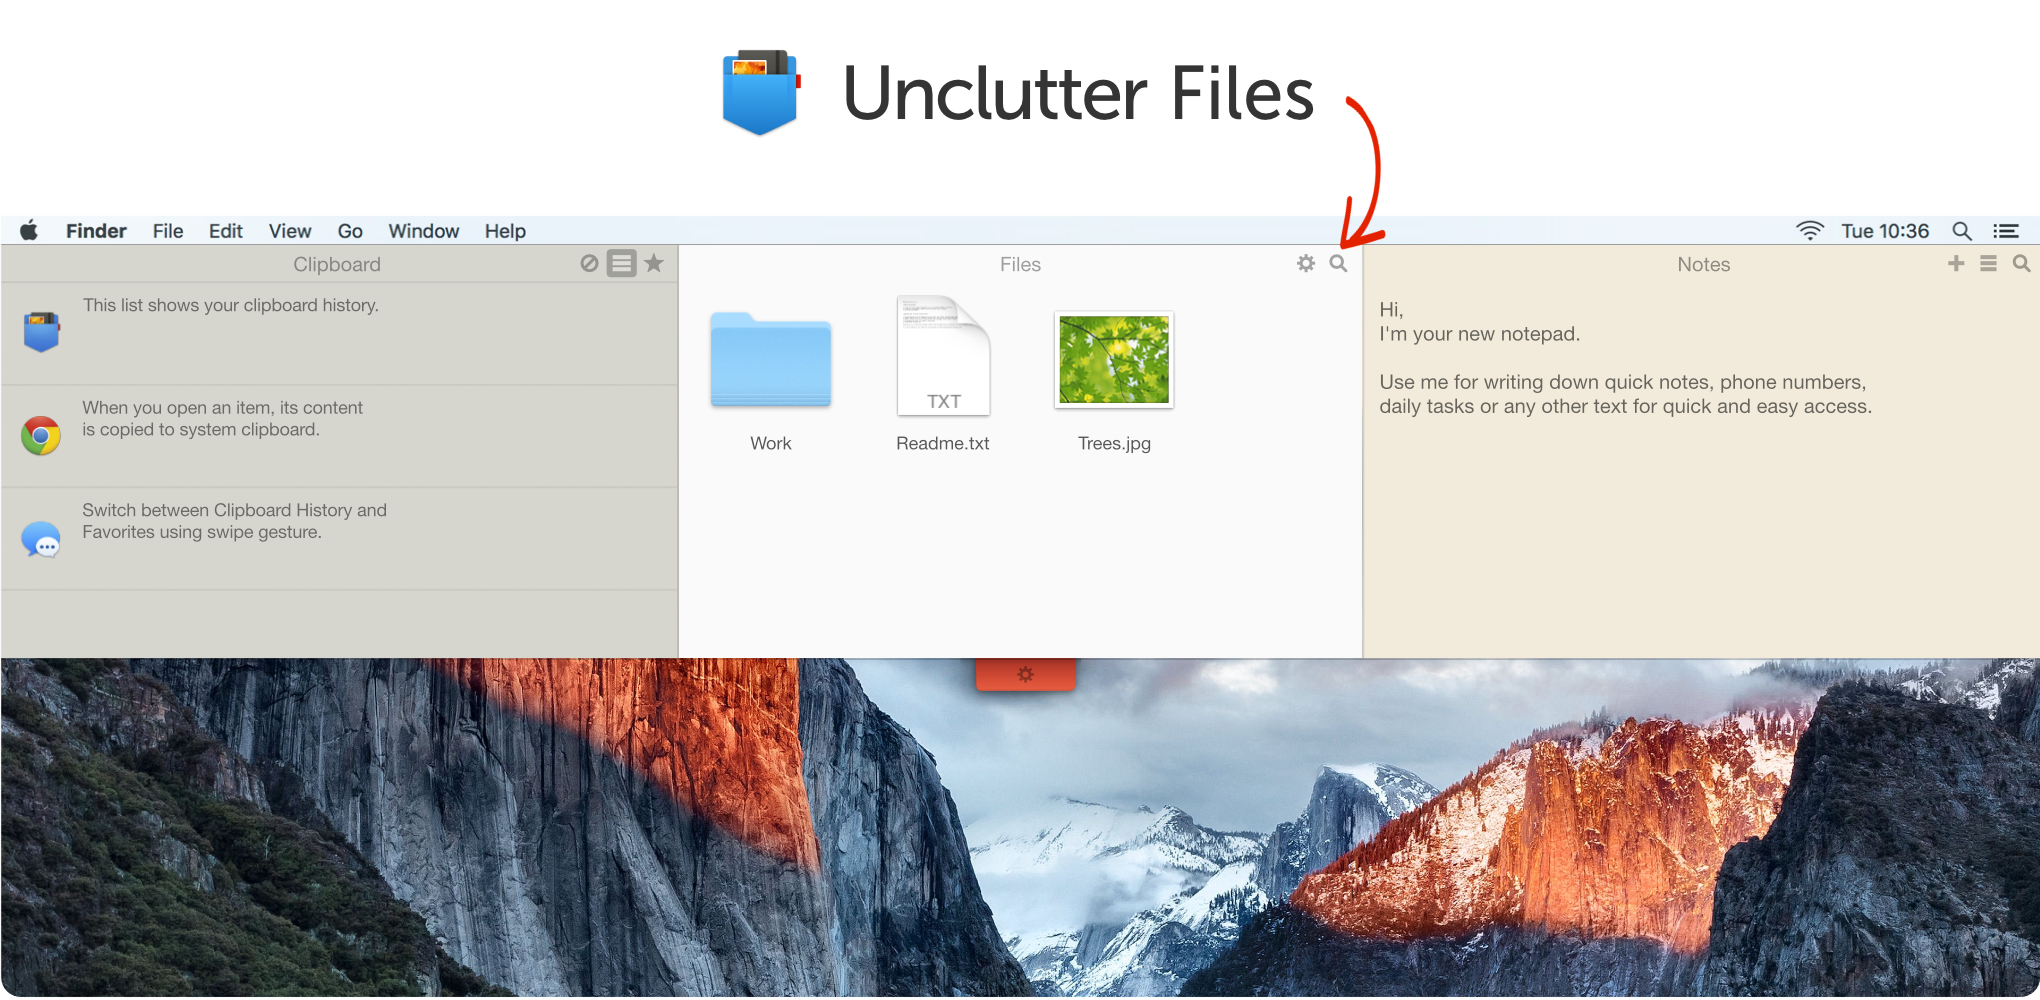
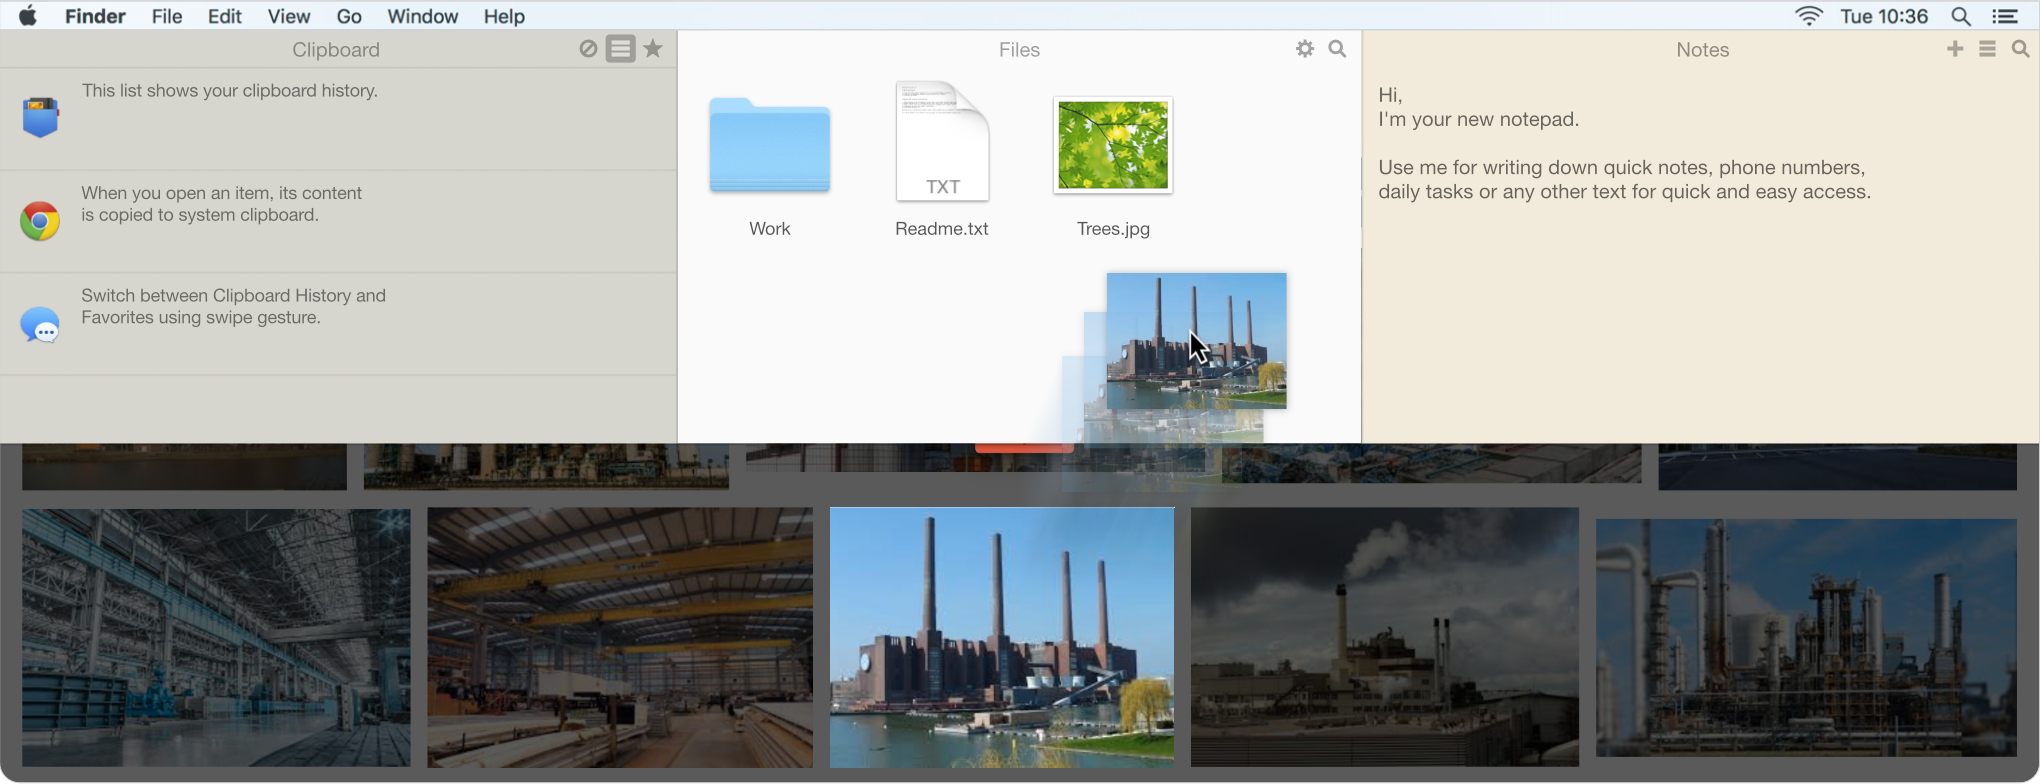
Unclutter Files is 1 of 3 great tools combined in a handy productivity app called Unclutter. This tool stores the files you use temporarily or quite often; it also serves as a drop zone for dragging files between applications.
Files Drop Zone
That’s how the Files drop-zone looks like. Here you can drop various files and folders for later use. As you can see, it doesn’t have much on it and is rather easy to use.
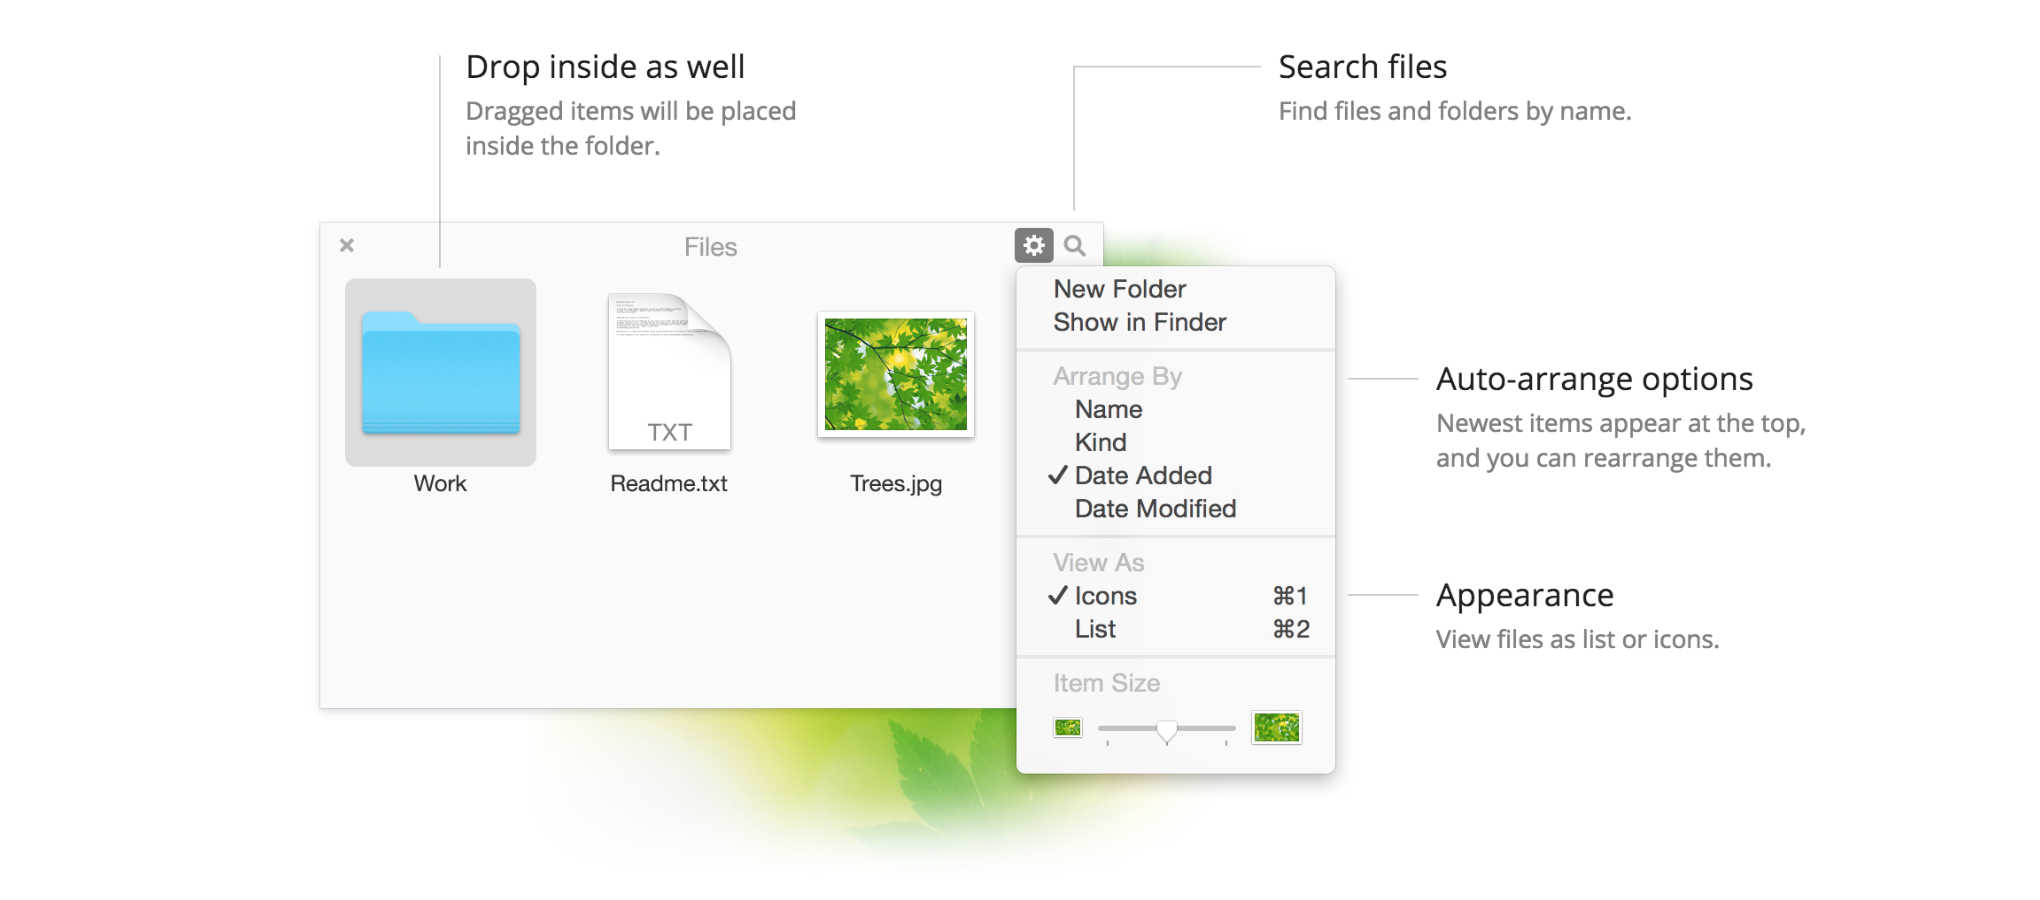
In the drop-zone, you can create a new folder, see your items’ location in Finder or search them by name. Classically, there are different ways to arrange, view and resize your items.
So, the menu set is pretty basic in order to keep it simple and to the point.
How Do I Actually Put the Items in This Very Drop-Zone?
Oh, it is so easy to do.
Take a file of your choice, drag it to the very top of your screen and simply drop it in the Files area of the shown up Unclutter window.
Once again, even simpler: drag it to the top & drop it. Done.
Just like that.
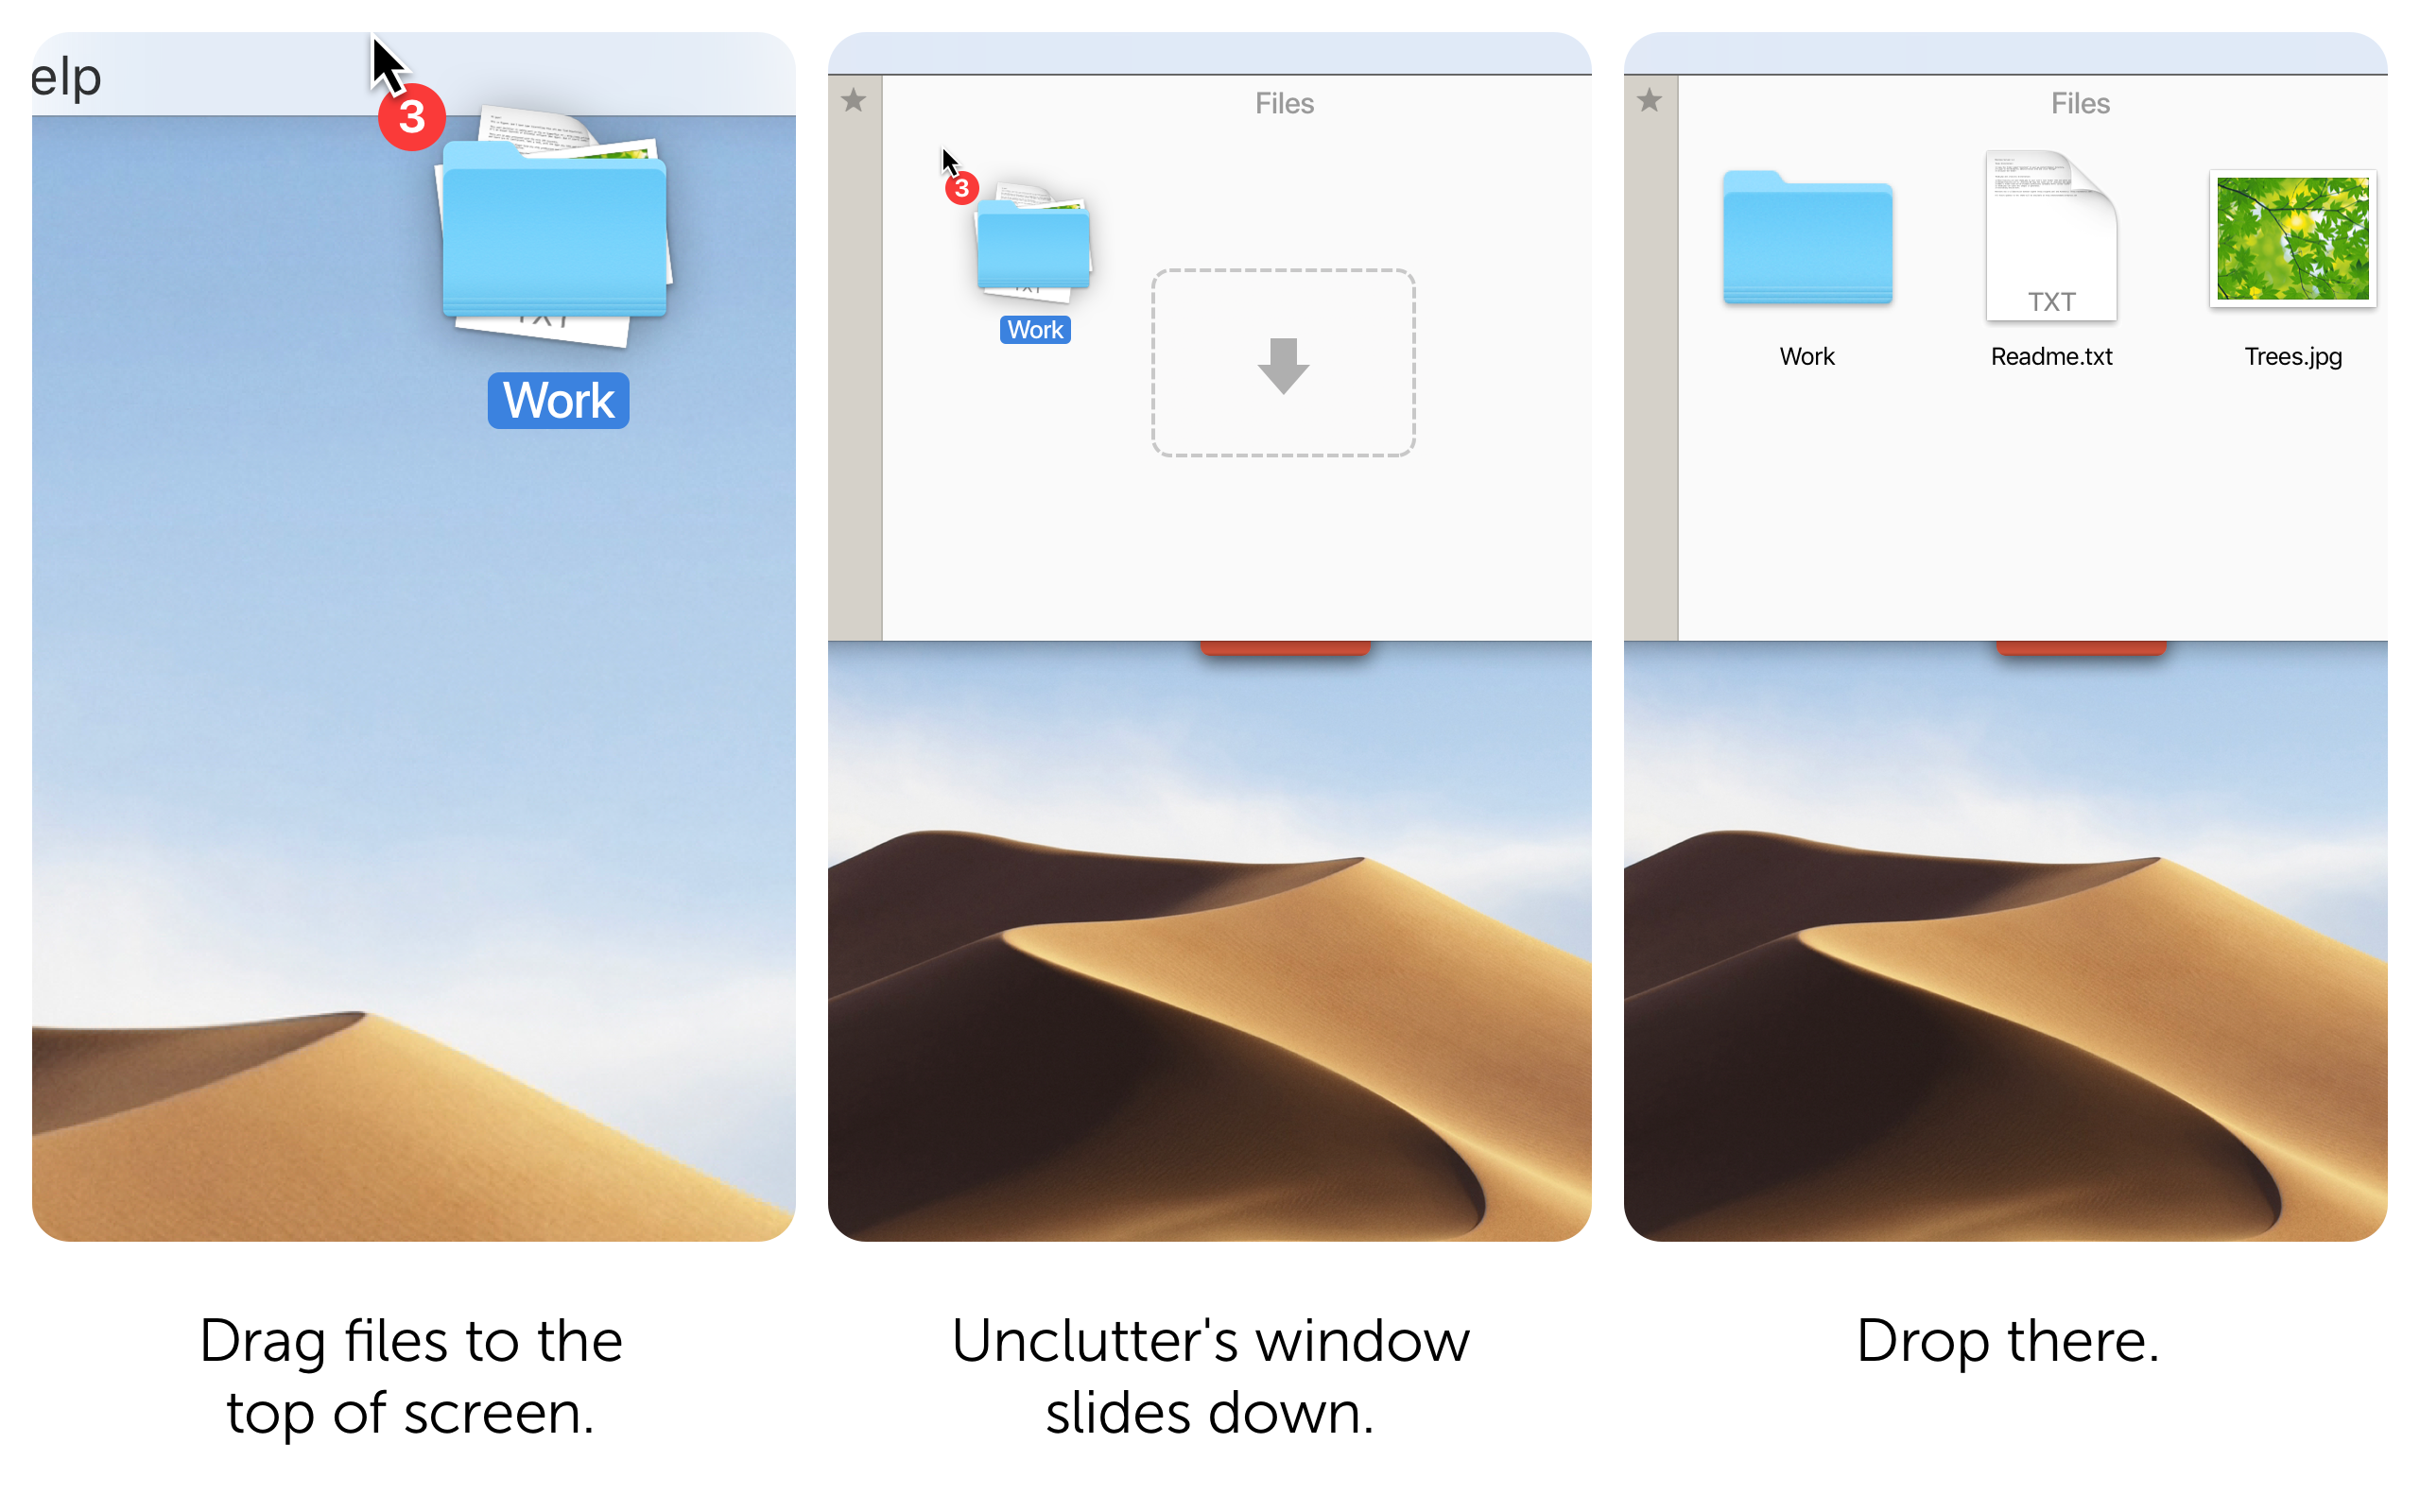
Basically, Unclutter Files operates like a regular folder in Finder, but with faster and easier access. When you drop a file in the Files panel, it will be moved there – just like Finder does it. If you want the files to be copied to Unclutter Files, hold the Option key while dragging it. Or you can hold Command+Option combination to create an alias.
Perfect Place for Storing Your Temporary Files

Unclutter Files was designed to spare you the fuss with temporary files and folders you create during the transferring process. There you can store some temporary files you don’t need at the moment but will use in the near future.
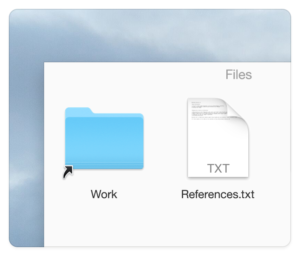
Now, let’s take Word docs on a specific topic which you want to gather from various folders and move into a new separate folder. All you have to do is just drag those files into the drop-zone. Anytime later – to your final destination. And the same method works with files transfer between applications. Say, if you want to attach some image from Desktop or Finder to your email.
All in all, your workflow is going to get easier, faster and more organized — soon you will notice how productive you have become.
Quick Access to Your Most Important Files
The files you use most often would fit great in Unclutter Files as well. Anytime you need a photo of your ID data, favorite cake recipes, a working document or some kind of a cheat sheet – you have it all at hand. Just move your mouse pointer to the top of the screen and scroll down to open Unclutter. Reap your item.
If you wish to keep your most used files and folders where they are, you can put aliases of those in the Files panel. Like mentioned before, it can be done by holding Command+Option keys while dragging an item to the drop-zone. Or you can create aliases in Finder and then drop those into Unclutter.
Recipe for Clean & Tidy Desktop
Is it bad to store files on Mac Desktop?
Actually, it’s not a very good idea. Especially, when the Desktop is really full of everything.
Apart from making it almost impossible to find the file you need, messy Desktop makes your Mac slower, its battery faster-dying, files on it less protected from crashes or OS recovery.
Even with the new Stacks feature in the upcoming macOS Mojave, I have to say, it is still hard to operate with the files stored on the Desktop. Although they are placed a bit less chaotically.
Thus, you would want to keep your Desktop tidy in order to avoid extra trouble. And Unclutter is here to help you with that.
Multiple-Screen Availability

Once you own Unclutter, you can have your personal drop-zone for all of your connected displays and existing Desktops (Spaces). Files panel serves as a great intermediary among your different apps and screens.
That is especially cool when you are that multitasking person who may be in the process of making PPT presentation, while surfing the net and photoshopping some photos found there, with a photo editing YouTube tutorial on the background.
Or kind of. The point being your multi-display workflow and strive for maximum productivity – the things Unclutter Files totally handles.
Auto-Sync Across All Your Macs

What’s more, your “uncluttered” files can auto-sync across all your Macs. For that, all you need to do is specify your Files storage folder to be inside a shared folder like iCloud Drive or Dropbox.
Thus, once you drag and drop an item on one of your Macs, you may later easily retrieve that item from the other Mac’s drop-zone (which must have the identical content if the devices are synced) and use it there.
Save Stuff From Everywhere
What I personally find as an awesome bonus is a feature of instant download by dragging of anything draggable from a webpage to the Unclutter Files drop-zone. Let me make it clearer.
With Unclutter, you can save virtually everything into its Files storage. Be it a picture, video, doc, tab, whatever – it will be saved in a corresponding format (if possible) or at least in the form of a link. Either from the Internet or from the other connected device.
Say, you are looking for an image of a factory for your PowerPoint presentation. You google “factory”, choose a pic you like, drag-and-drop it in Files panel. The picture is downloaded and saved. Nothing is easier.
And It’s Only 1/3 of the App!
Finally, the great news is that Files panel is only 1 of 3 essential tools Unclutter app has to improve your productivity and keep your Mac clutter to a minimum. The other two sections Unclutter includes are:
(Click on the link to get more info)
It means you get three productivity tools for the price of one. And they are nicely combined in a simple and neat interface which is quick and easy to use.
To sum up
 Now you know how to store temporary files on your Mac while keeping the Desktop healthy.
Thanks to Unclutter Files, you can clean up your Desktop, get rid of temporary files, speed up your Mac and get more organized in general. And there are still 2 more tools inside to amaze you.
So, do not get bothered by the clutter on your workspace — Unclutter is going to take care of it. Your Mac will say “Thanks!” ?
Want a test-drive?
Download Unclutter 7-day trial version. It is free:
https://unclutterapp.com/download