Efficient copy paste, drag & drop, notes, and more

One of the reasons why you own a Mac is probably the pleasant and smooth user experience it provides. That is something we love Apple products for. And it’s also what the quality of our workflow depends on.
Smooth and productive Mac workflow – how exactly is that? It’s when you can stay focused on your main task while easily switching to the other ones, do your job on Mac with minimal distractions, less effort and time spent.
In this article, we want to share with you some tips and apps that will help you maintain a more convenient, efficient and seamless Mac workflow.
We will cover: Keyboard shortcuts, Trackpad gestures, Hot corners, Drag & drop, Clipboard management, Quick notes, and a few bonus tips worth your attention.
Now, let’s dive right in.

Cognize the Keyboard’s Power
Your Mac keyboard has so much potential in it – and that goes beyond the standard key shortcuts everyone knows. Take a look at some of its interesting abilities.

- App menu hotkeys. Go to your Desktop screen. Take a look at the left side of the menu bar – it should have ‘Finder’ and its menus (File, Edit, View, etc). Click on any of those and you’ll see the app menus pop up. Each has useful key shortcuts for multiple actions you often perform (kind of a ready guide). Thus, right from your Desktop, you can go to different folders, edit a file or text, change the view and a lot more.
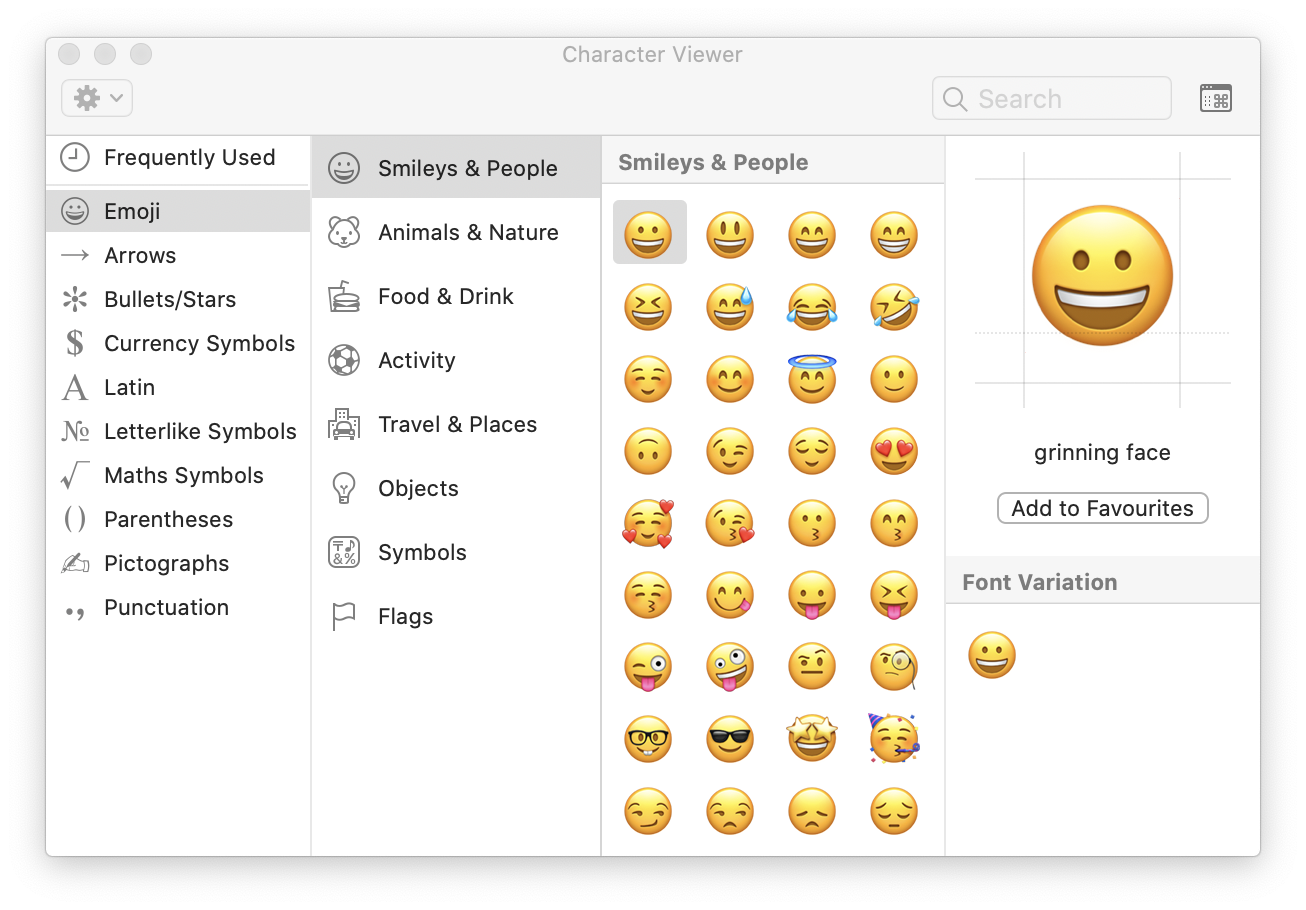
- Character Viewer. Your Mac has a built-in tool for choosing and pasting all kinds of characters – Character Viewer. Call it up whenever you need an emoji or symbol by pressing ⌃⌘␣ hotkey or ‘Show Emoji & Symbols’ in the menu bar language setting.
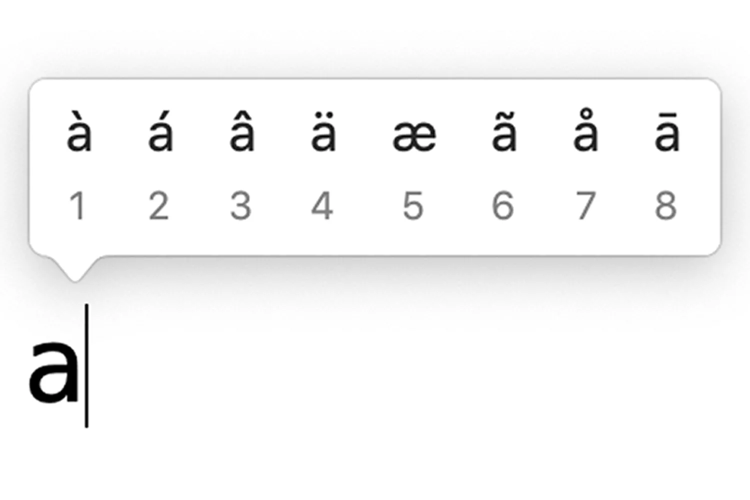
- Instant diacritics. There is the simplest way to type accented letters. No key combination memorizing or searching the characters on the Internet. You just hold a keyboard letter (say, ‘a’) which has diacritic alternatives (à, â, æ, etc) and choose the one you need by pressing the number assigned to it.
- Custom shortcuts. You can create your own key and text shortcuts. Visit Keyboard settings in System Preferences for that. In the Shortcuts tab, set your own key combinations; in the Text tab, create your text expansion shortcuts. Play around with it, use your hotkeys and you’ll notice some workflow boost.
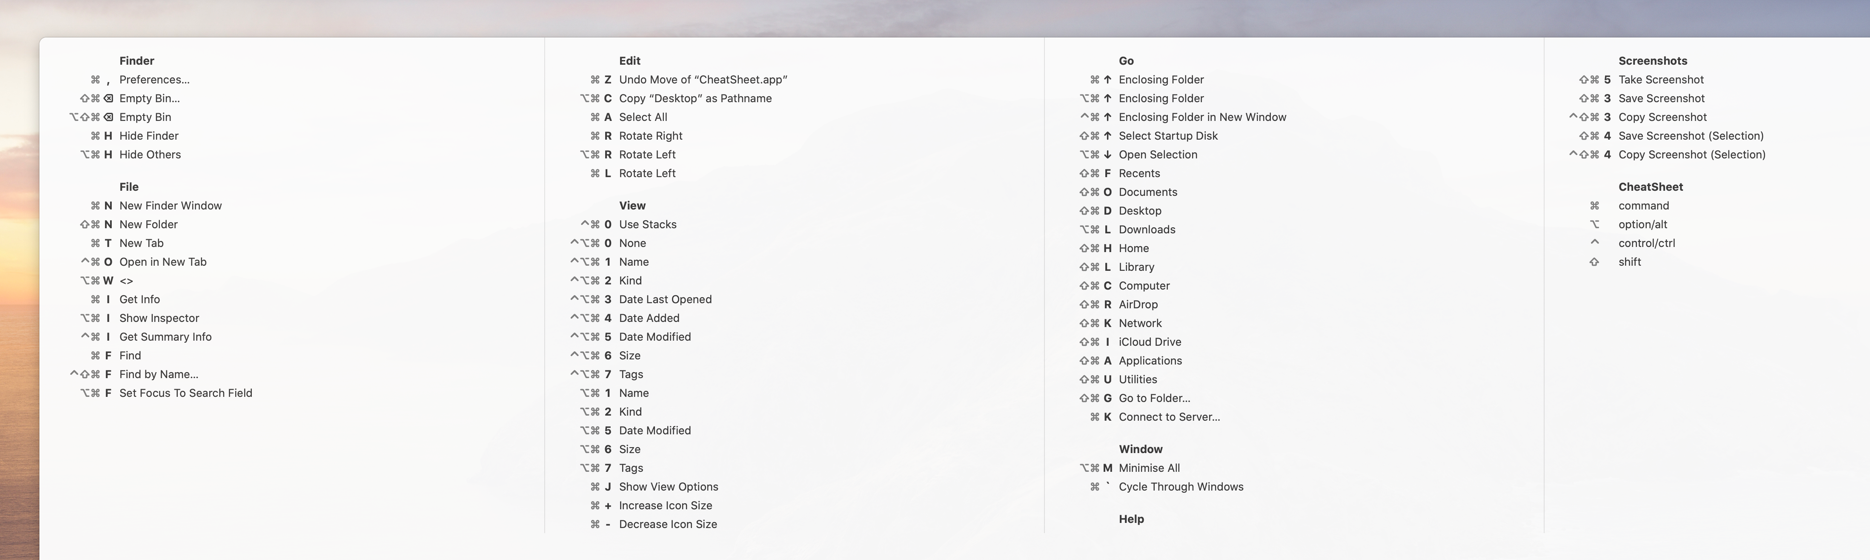
CheatSheet is a great free tool to help you visualize active hotkeys. Hold Cmd and it’ll show you all the key combinations of the app you currently work in. Just like your exam cheat sheet.

Trackpad Magic
If a MacBook is where your work mostly happens, you’re lucky to have a beautiful built-in tool called Trackpad (or you can have it separately, good for you then). Any Apple trackpad is pleasant to the touch, smooth, practical and eager to make you more productive.
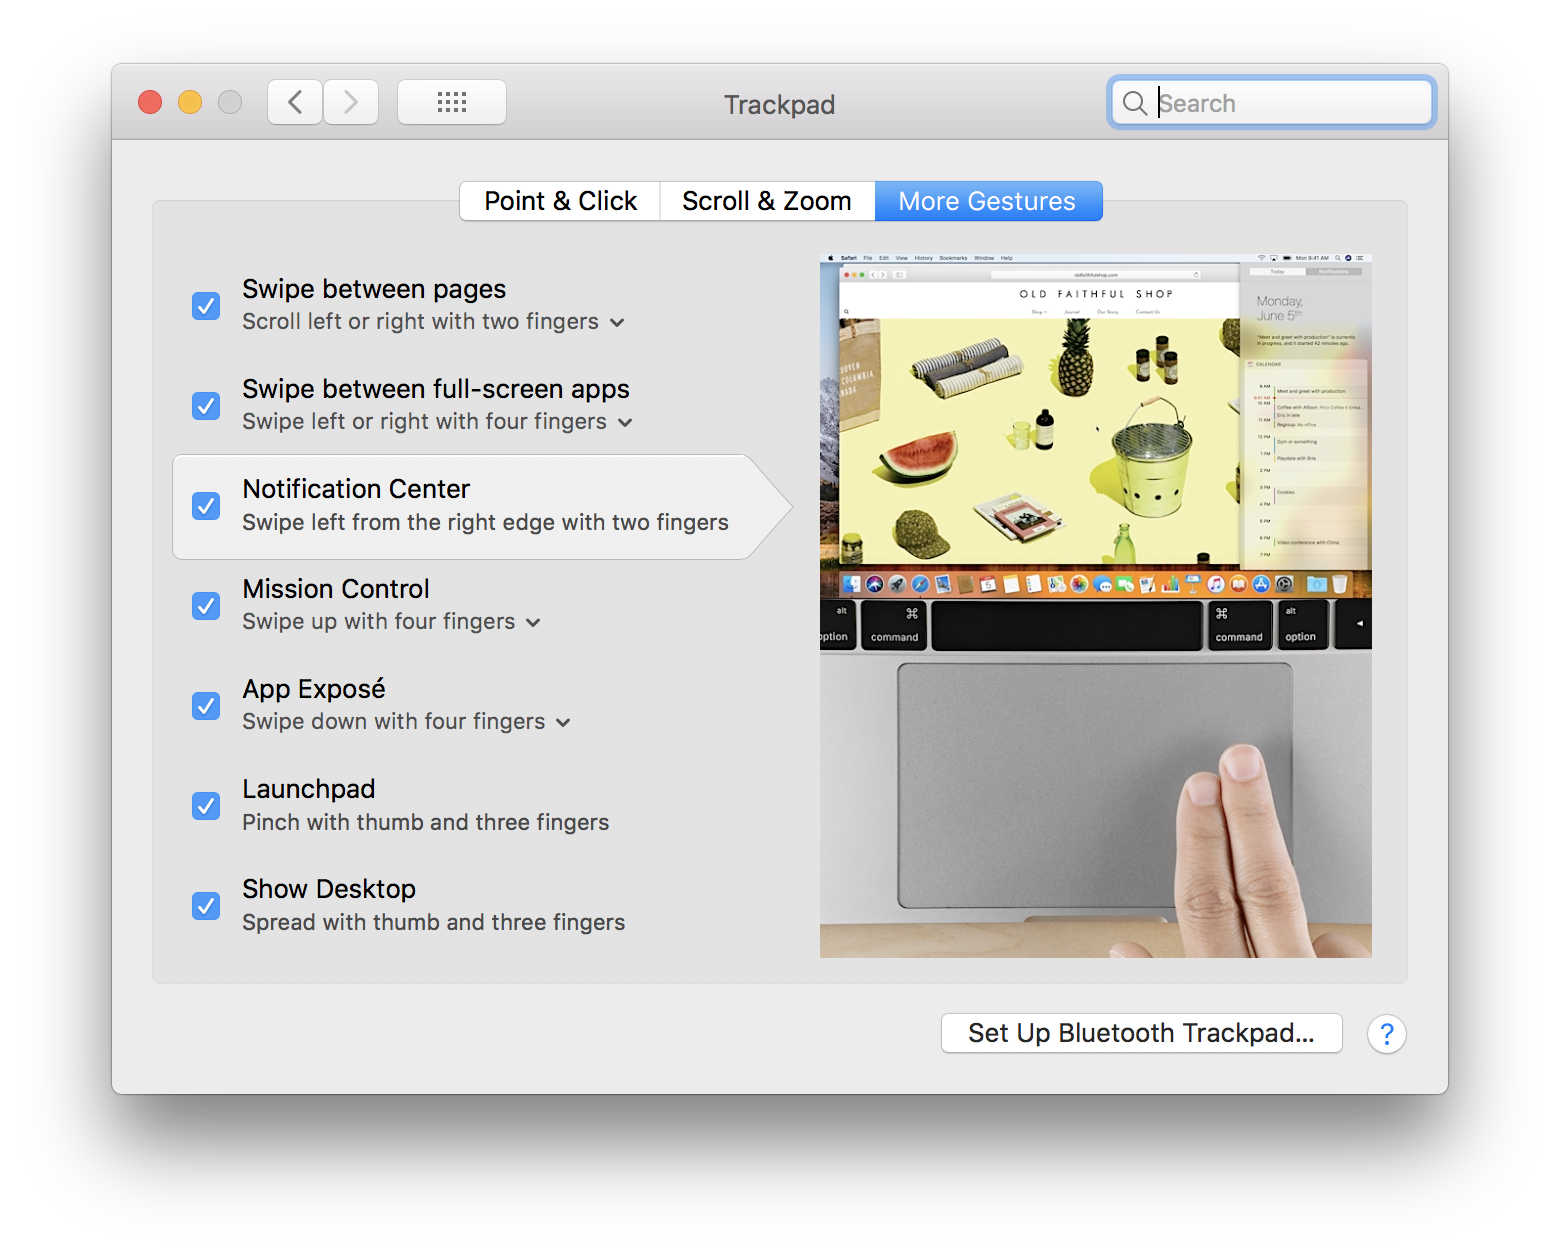
Aside from the well-known clicks, scrolls and zooms, the trackpad provides popular macOS commands with two, three or even four fingers. Switch between pages, apps and Spaces with just a horizontal swipe; 3-finger swipe up for Mission Control, and down – to show all windows of the active app (App Exposé); and more.
Check and set up those “sophisticated” gestures in System Preferences > Trackpad > More Gestures.

Instant Hot Corners
On the other side of the coin, there’s another smooth Mac feature you can enable, especially if you don’t have a trackpad – it’s hot corners. Just like trackpad gestures, hot corners offer quick useful actions to nicely speed up your workflow.
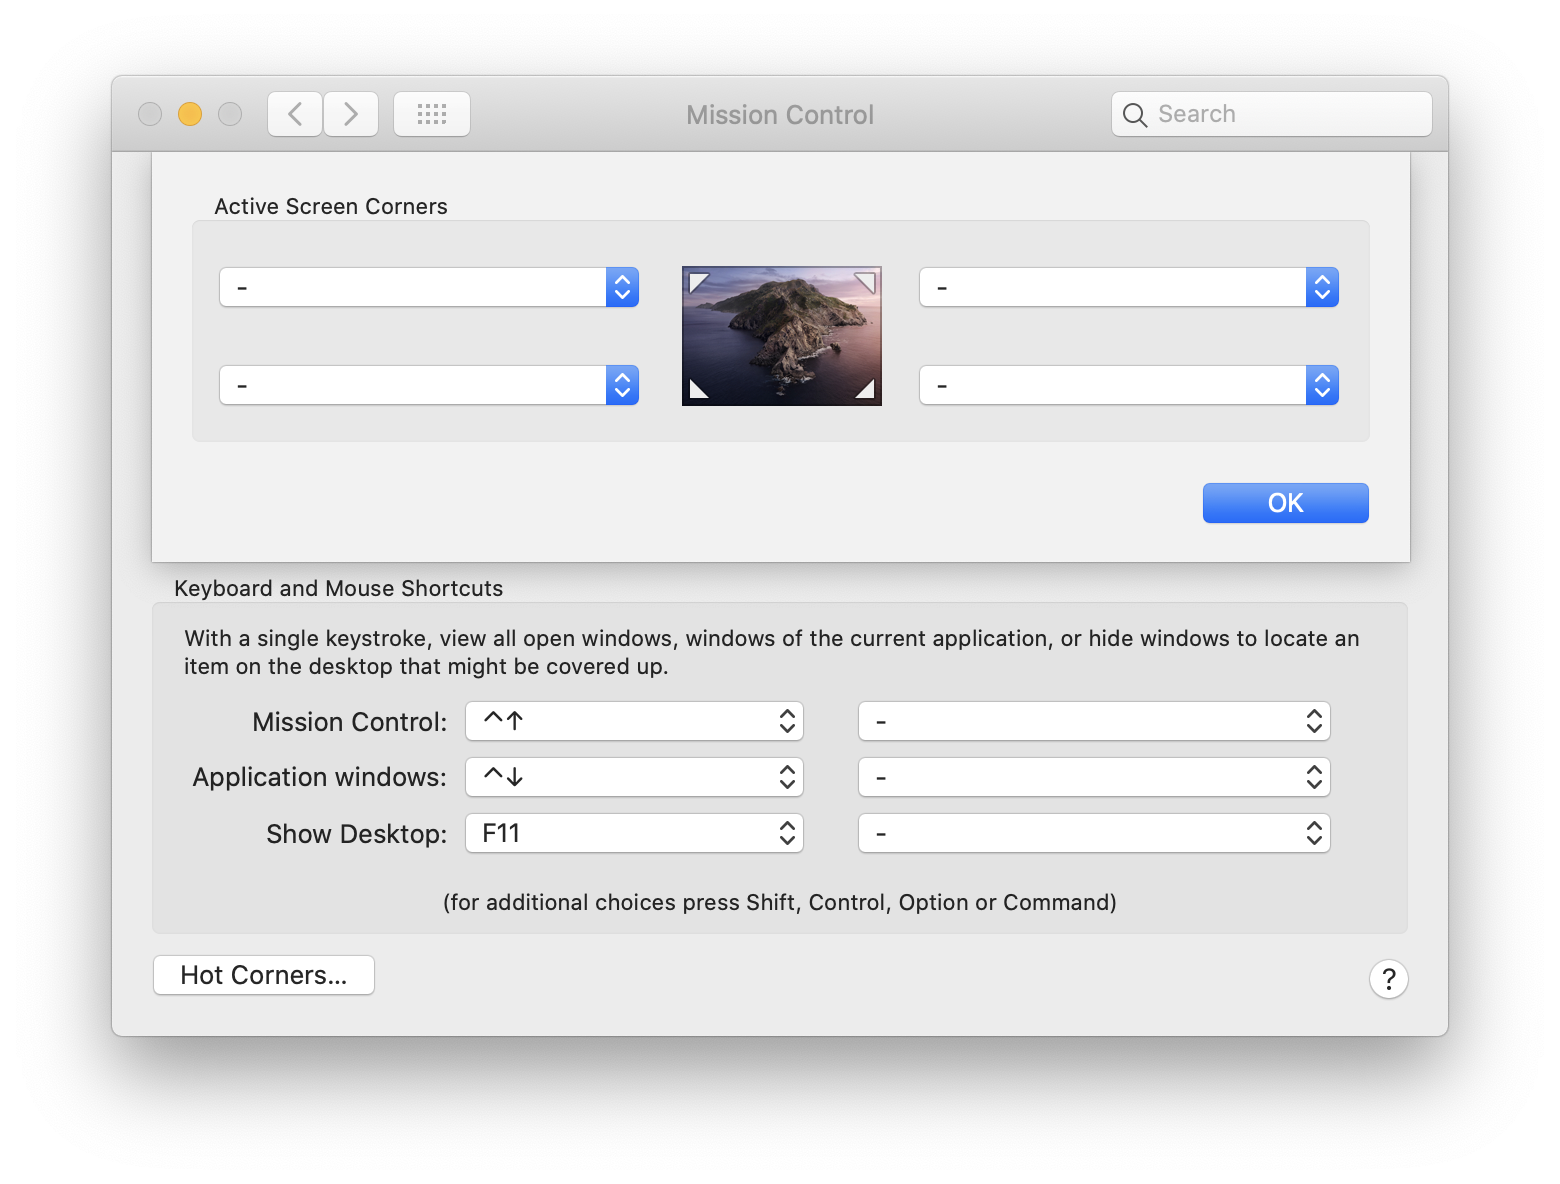
Go to System Preferences > Mission Control > Hot Corners…, and you’ll see 4 blank spaces responsible for your 4 screen corners. Choose the action you like to be performed on swiping to each of those corners. Thus you’ll be able to do some basic commands by a simple one-finger flick.
The actions you can assign to each corner are partly the same as the Trackpad ones. And they also require minimal effort, are super smooth and fast. Pure pleasure.

Drag & Drop Without Boundaries
Drag and drop, an intuitive gesture we all use, gives you the ability to transfer data between the most remote locations with ease. But it’s more than just moving files between places. It offers you many valuable uses, such as:
- Rearrange icons, windows, folders, tabs – anything
- Insert images into text or docs
- Move text snippets
- Drop item(s) to a specific area to perform some action
- Copy an object if you hold ⌥ Option while dragging
- Make an alias of an object if you hold ⌘ Cmd + ⌥ Option while dragging
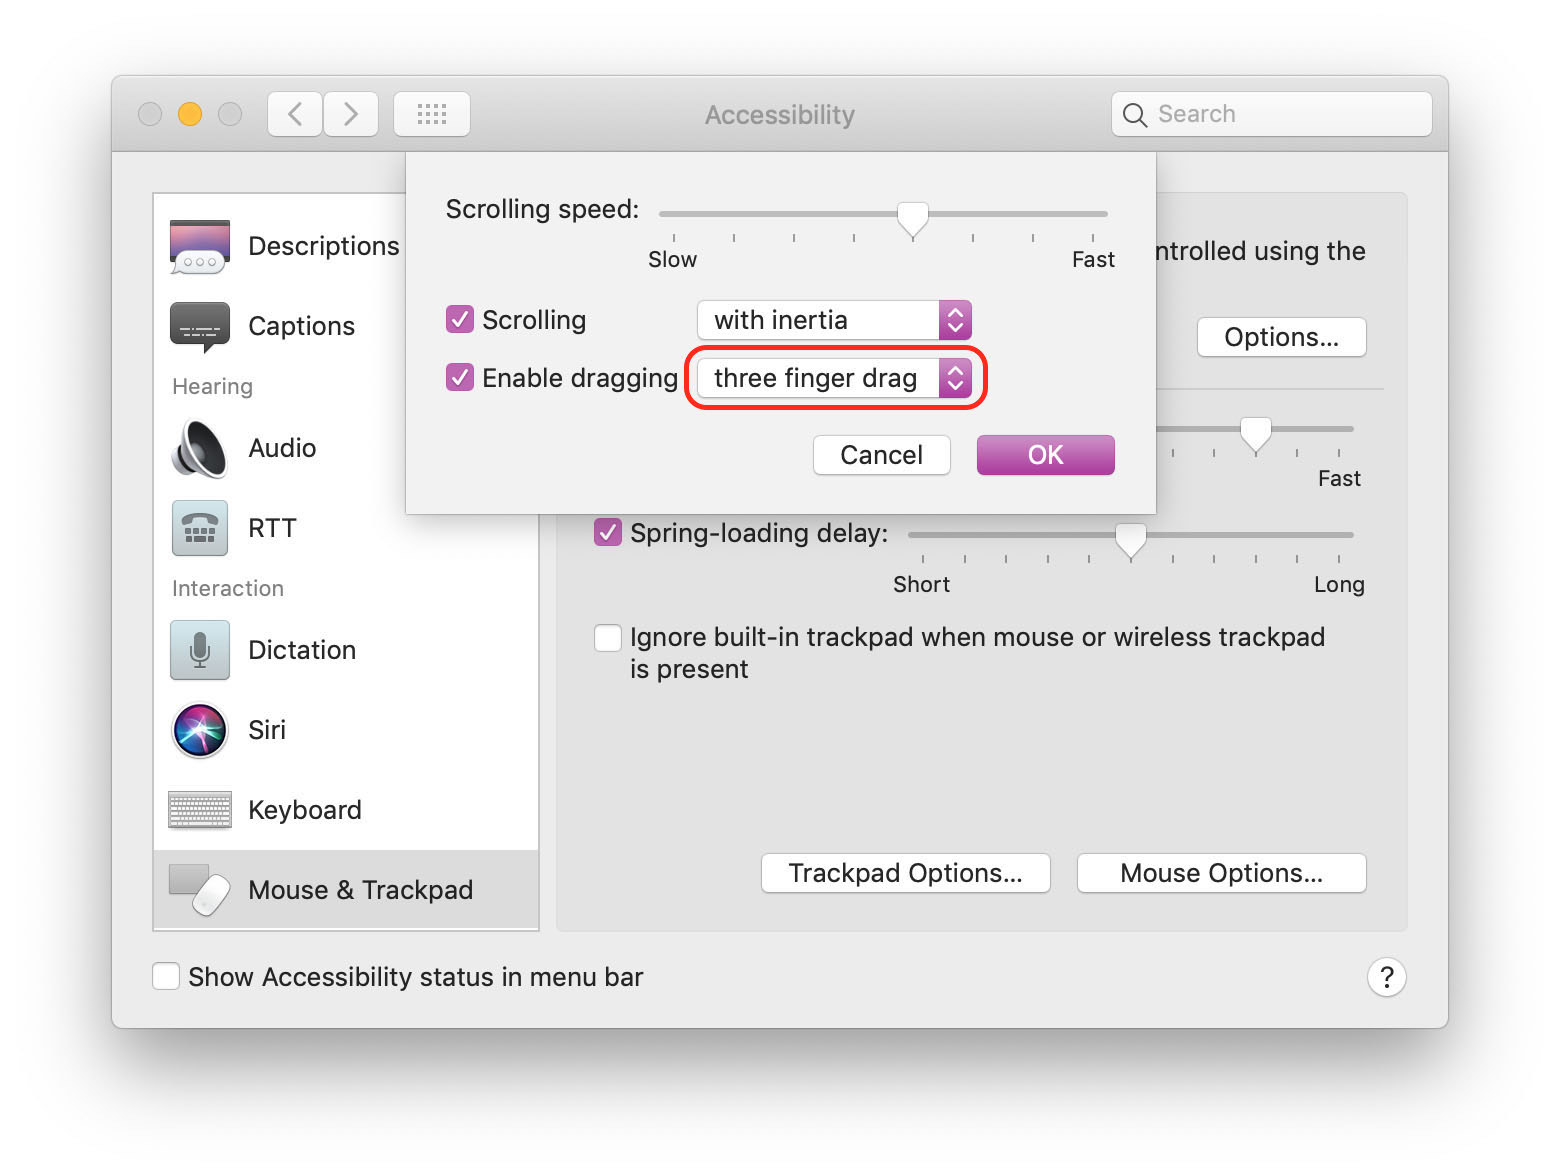
Three-finger drag is a noteworthy feature you might not know about. It implies no clicks, only sliding on a trackpad. Such a ‘drag’ adds extra smoothing for your MacBook workflow and it’s particularly handy for those who drag and drop restlessly (e.g. photo/video/audio editing).
To enable three-finger drag, go to System Preferences > Accessibility > Mouse & Trackpad > Trackpad Options… and there you Enable dragging: three finger drag. Bear in mind that by activating it, your other three-finger trackpad gestures (like Mission Control and App Exposé) become enabled with four fingers.
Show Desktop command may come in handy when you need to drag and drop anything from your Desktop. There are 3 ways to Show Desktop on a Mac:
- Fn + F11 or ⌘ Cmd + F3 hotkeys
- 4-finger spread on a trackpad
- a created hot corner
For a most efficient drag and drop from a Desktop, we recommend using a hot corner. In the settings (explained before), choose a screen corner you prefer and select the Desktop option.
So, how does it work:
Swipe to our hot corner, you’ll be able to choose your item from a shown Desktop. Drag it back to that corner, your active windows will reappear. Drop the item where needed.
* * *
The awesome thing is that various third-party Mac apps manage to find fresh approaches to the very same drag and drop. One of such apps is Unclutter.
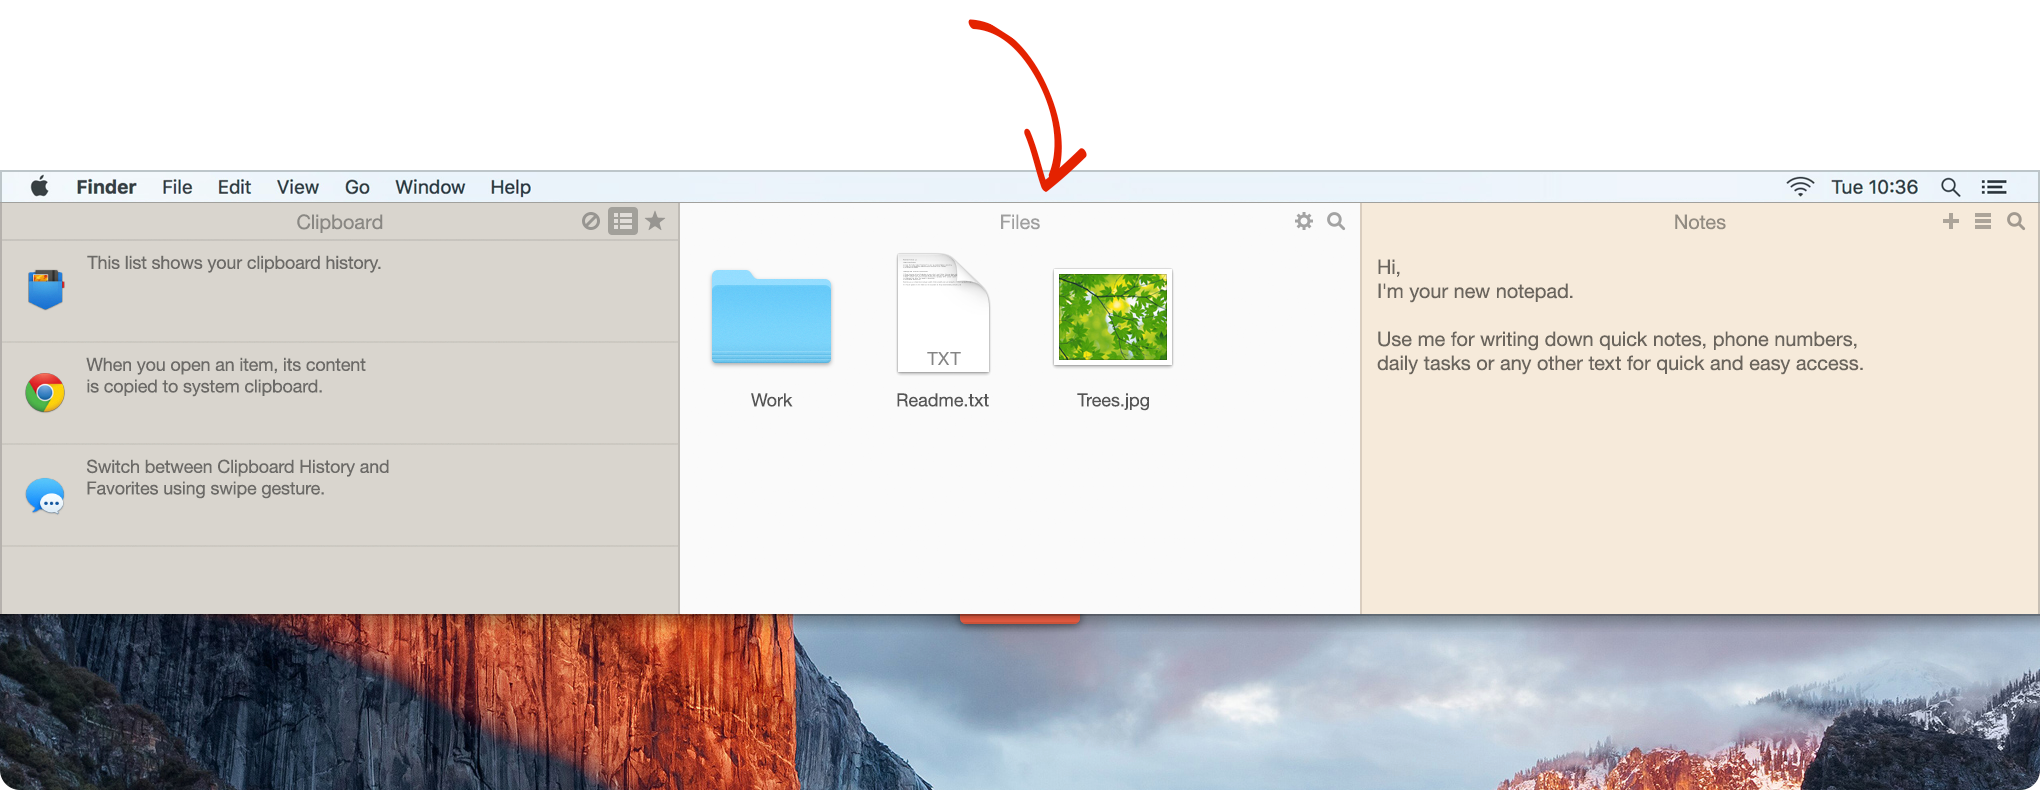
The Unclutter’s Files panel is like a secret shelf for your temporary and most used files. Being normally hidden from your eyes, the Unclutter window activates when you drag anything to the top of the screen. It allows you to drop your file there and get back to work right away.
Whenever you need an item from Unclutter, scroll down from the very top of the screen and drag & drop that item to your destination. This way your drag-and-drop is simplified, non-stressful, and you stay focused on your main task.
In other words, the purpose of Unclutter Files – your casual file storage and transfer. Keeping your workflow seamless and organized.
Manage Your Clipboard History
Copy-paste is another action we can’t imagine our devices without. It is plain, multipurpose and essential for virtually any kind of work on a Mac.
If you think about it, copy-and-paste is rather similar to drag-and-drop in its purpose: to have something transferred from one place to another. Enhance your copy-paste ability with the following good-to-know tricks.

- Paste options. We all know the Mac key combinations for copy (⌘C), cut (⌘X – only with text) and paste (⌘V). Although there’s a chance you’re not that deft with the paste options.
- If you don’t want to paste the formatting together with the text itself, ‘Paste and Match Formatting’ by pressing Shift-Cmd-V (Alt-Shift-Cmd-V in some apps). For more pasting options, call up the ‘Paste Special’ menu with Ctrl-Cmd-V and choose your way to paste the clipboard content.
- Multiple section selection. Sometimes you need to copy different snippets which are scattered across the text. This can be done without repeating the same copy-paste action over and over again.
- Here’s how: highlight all the separate snippets while holding ⌘ Cmd, copy that bunch and then paste it as one piece.
* * *
Although copy-paste is so important and often used on our Macs, its functionality is rather limited in macOS. Mostly, because a Mac can normally store the latest copied element (or group of elements) only. Lucky for you, some productivity apps – clipboard managers – solve this issue. Unclutter can do that too.
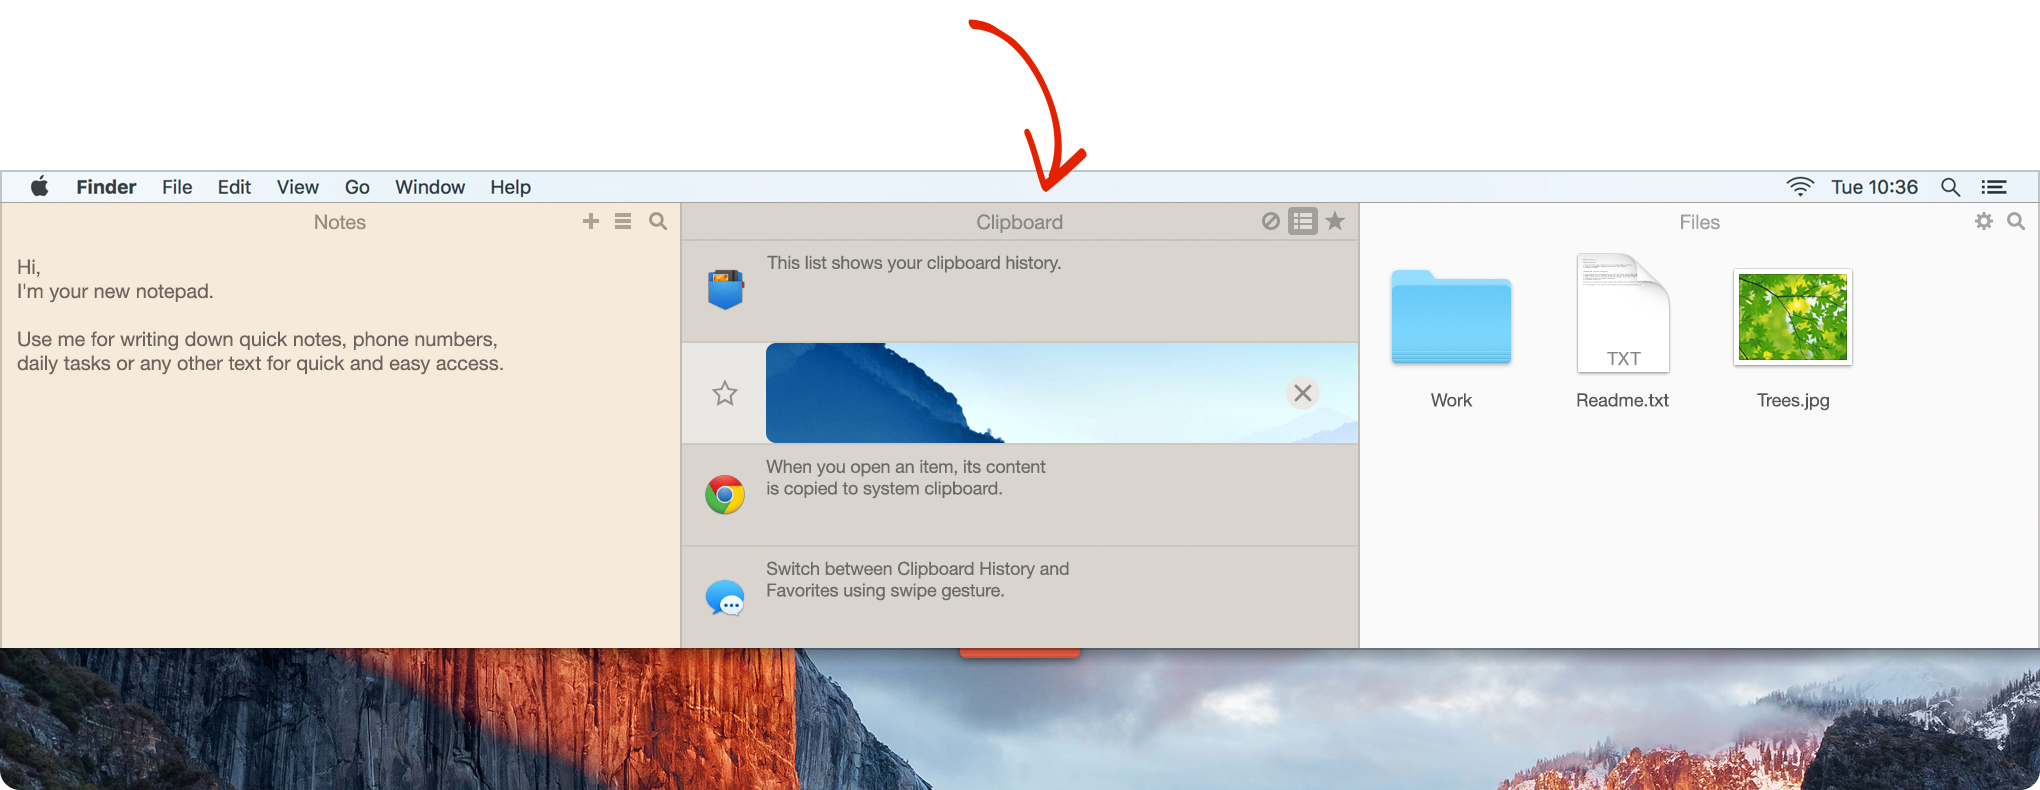
The app’s Clipboard History panel is the one we focus on here. It represents a list of the multiple items you copied recently. Not only you can view the history of what you’ve been copying before, but also recall any of those clips.
Unclutter also has a separate list for the clips you use the most – Clipboard Favorites. These have no expiration date and they’re ready for paste at any time.
On top of that, you can edit the content of your text clips – right in Unclutter, before pasting. And, of course, the clipboard manager is instantly accessible from the top of your Mac screen.
Jot Down Notes Like Smoke
Keeping your notes on Mac is a popular decision nowadays. And an abundance of various note apps serves as proof of that. But we won’t talk about those or the 2 system notepads every Mac user knows (Apple Notes and Stickies). Let’s have a look at a “workflow-friendly” solution we suggest.

So, what about a note-taking app which would contribute to your smoother, more efficient workflow? You’ll be surprised… but the same Unclutter can pull it off as well.

Unclutter Notes is the app’s third panel and it’s all about – you guessed it – notes. This notepad’s power is in its simplicity, agility and accessibility.
To start writing a note, you only need a scroll from the top of the screen. And the blinking cursor waits for your input. With Unclutter Notes, you won’t be distracted by the search and opening of any app. So you remain focused, while your workflow – smooth.
Need a Post-it note in front of your eyes? Drag the Notes panel out of the Unclutter window and place it anywhere – it’ll stick on top of all windows. Pretty handy, huh?

Bonus Tips

- Spotlight. No need to waste time looking for deeply buried files or folders you might have forgotten the location of. Find anything on your Mac in a matter of seconds using the built-in Spotlight. Just click the magnifier icon on the menu bar and start typing the name (or content) of what you’re searching for.

- Desktop Spaces. You may be working with 2 or more completely different projects which require lots of space and windows opened at the same time. In this case, having several Desktop Spaces help a lot. They serve as multiple workspaces providing better workflow organization and convenience.
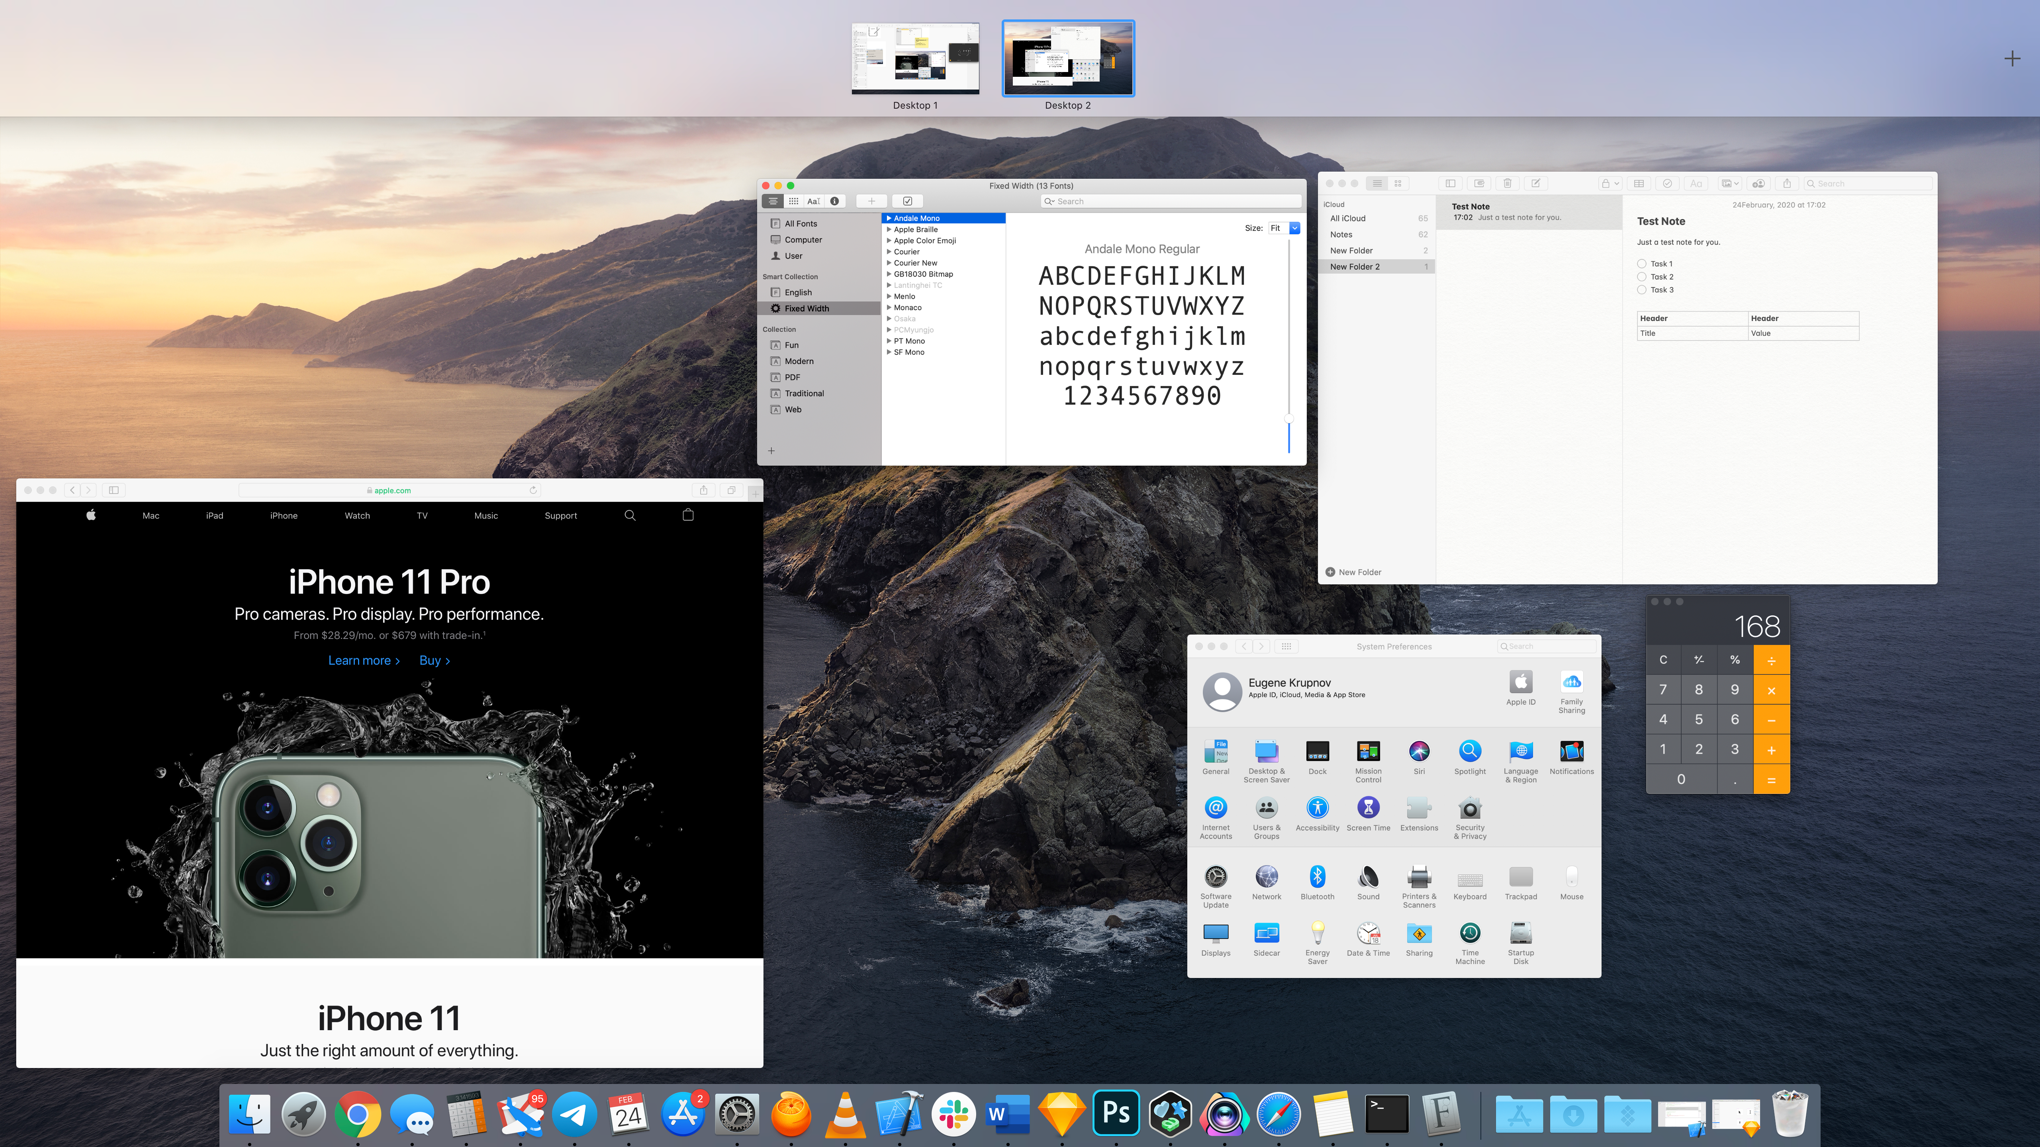
- Call up Mission Control to overview all your open windows, thumbnails, apps you have on the Desktop(s) and quickly go to any of those. Also, manage your Spaces and move windows between them.
To sum up
Our Mac productivity depends on the little things we do and how we do them. Every time you use a memorized key shortcut, perform an action with a trackpad gesture or resort to one of the Mac tools – you save a bit of time and effort. The quality productivity software plays an important role here too.
Drag and drop, copy and paste, note-taking, keyboard combinations, trackpad gestures and hot corners – all of them bring you to the whole new level of productivity when their full potential is used. The optimized actions paired with nifty utilities allow you to achieve the results faster, easier and with more convenience. While you, in turn, stay focused on your main task and enjoy the smooth workflow.